Intent data is only as useful to the extent it can be activated in your tech stack. Connect INTENTIVE to HubSpot to leverage rich account and buyer-level insights in your CRM for marketing, sales, and customer success use cases.
INTENTIVE offers two integration workflows to support HubSpot customers on any account tier. This document walks you through how to set up the Enterprise Workflow, which leverages Custom Objects in HubSpot. The integration allows you to send all account and buyer-level insights for activation, with full flexibility and control of how you use the intent data in your campaigns and workflows.
Integration Requirements:
- HubSpot Account: Enterprise (Custom Objects are only available in HubSpot Enterprise accounts)
- Data model: Custom Objects
- Implementation Methods:
- API: Recommended for faster set up. Requires developers.
- Manual: No developer required.
Data Sync Details:
- Frequency: Daily updates
- Historical backfill: One-time at initial set up
- One INTENTIVE Explorer per integration active at a time. Support for multiple Explorers will be added.
Create a Custom Object in HubSpot: API Method
- Generate a token in HubSpot by creating a Private App.
- Make an API call using that token to create the custom object.
Step one: Create a Private App
In HubSpot, Click on Settings (top right menu), Then in the menu on the left, click on Private Apps. If you haven’t created any Private apps yet, you should see the following screen:

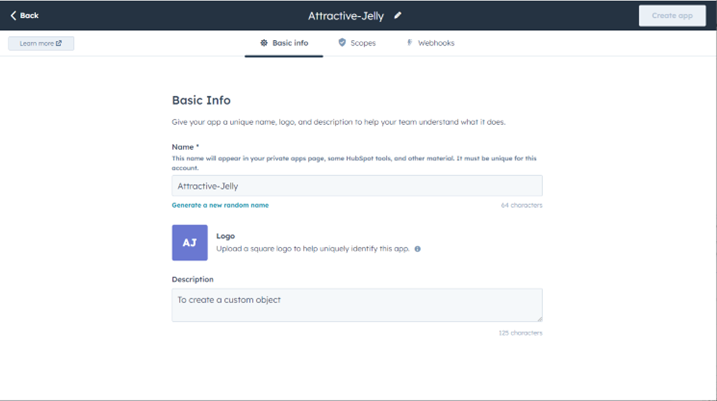
Click on Create a private app, and fill out the Basic Info. For example:
Click on the Scopes, and select the following:
crm.schemas.custom.read
crm.schemas.custom.write
oauth

Then click on Create app and you should see the popup:
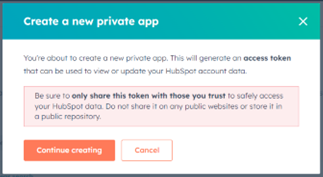
Click Continue creating and you’ll see:

On closing this popup, you’ll see more details about your private app:
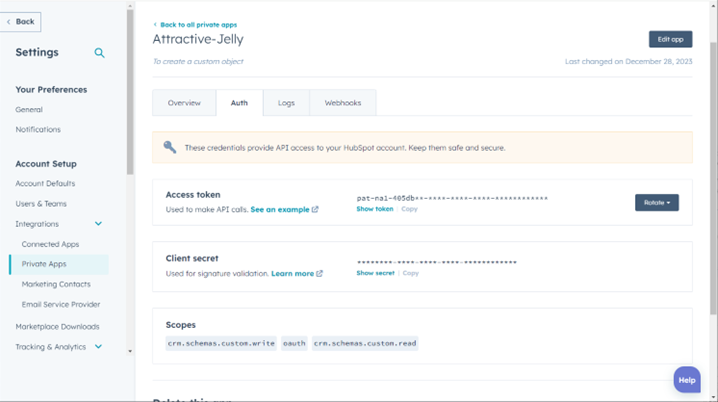
You will need the access token for step two
Step two: Make an API Call to create the Custom Object
We illustrate here how this step can be done using postman.com but you can use other tools. See the HubSpot API documentation – Custom Object for more information.
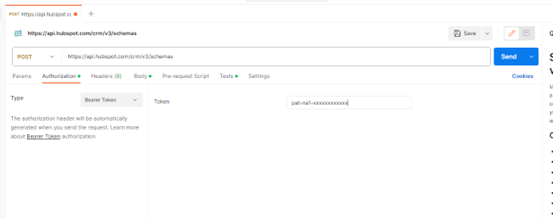
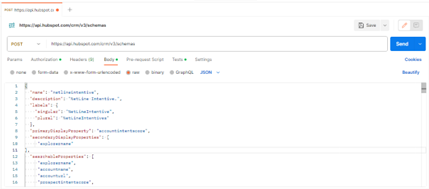
Set the Post URL to https://api.hubspot.com/crm/v3/schemas
Set Authorization Type to: Bearer Token
And paste your token, for security reason you may want to store your token in a variable.
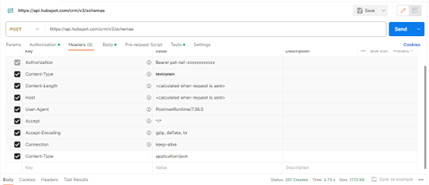
For the tab Headers make sure
Content-Type is set to: application/json
Copy this in the body
{
“name”: “netlineintentive”,
“description”: “NetLine Intentive.”,
“labels”: {
“singular”: “INTENTIVEInsight”,
“plural”: ” INTENTIVEInsights”,[AD1] [SP2] [AD3] [SP4]
},
“primaryDisplayProperty”: “accountintentscore”,
“secondaryDisplayProperties”: [
“explorername”
],
“searchableProperties”: [
“explorername”,
“accountname”,
“accounturl”,
“prospectintentscore”,
“confirmedproject”
],
“requiredProperties”: [
“explorername”,
“accountname”,
“activitydate”,
“accountactivitytype”
],
“properties”: [
{
“name”: “accountintentscore”,
“label”: “Account Intent Score”,
“type”: “number”,
“fieldType”: “number”
},
{
“name”: “explorername”,
“label”: “Explorer Name”,
“type”: “string”,
“fieldType”: “text”
},
{
“name”: “accountname”,
“label”: “Account Name”,
“type”: “string”,
“fieldType”: “text”
},
{
“name”: “accounturl”,
“label”: “Account URL”,
“type”: “string”,
“fieldType”: “text”
},
{
“name”: “activitydate”,
“label”: “Activity Date”,
“type”: “date”,
“fieldType”: “date”
},
{
“name”: “accountactivitytype”,
“label”: “Account Activity Type”,
“type”: “string”,
“fieldType”: “text”
},
{
“name”: “engagedbuyers”,
“label”: “Engaged Buyers”,
“type”: “string”,
“fieldType”: “text”
},
{
“name”: “accounttrendingtopics”,
“label”: “Account Trending Topics”,
“type”: “string”,
“fieldType”: “text”
},
{
“name”: “confirmedproject”,
“label”: “Confirmed Project”,
“type”: “string”,
“fieldType”: “text”
},
{
“name”: “companylocation”,
“label”: “Company Location”,
“type”: “string”,
“fieldType”: “text”
},
{
“name”: “employeecountrange”,
“label”: “Employee Count Range”,
“type”: “string”,
“fieldType”: “text”
},
{
“name”: “industry”,
“label”: “Industry”,
“type”: “string”,
“fieldType”: “text”
},
{
“name”: “estimatedannualrevenue”,
“label”: “Estimated Annual Revenue”,
“type”: “string”,
“fieldType”: “text”
},
{
“name”: “jobfunction”,
“label”: “Job Function”,
“type”: “string”,
“fieldType”: “text”
},
{
“name”: “joblevel”,
“label”: “Job Level”,
“type”: “string”,
“fieldType”: “text”
},
{
“name”: “prospectintentscore”,
“label”: “Prospect Intent Score”,
“type”: “number”,
“fieldType”: “number”
},
{
“name”: “buyertrendingtopics”,
“label”: “Buyer Trending Topics”,
“type”: “string”,
“fieldType”: “text”
},
{
“name”: “buyeractivitytype”,
“label”: “Buyer Activity Type”,
“type”: “string”,
“fieldType”: “text”
},
{
“name”: “buyeractivitydetails”,
“label”: “Buyer Activity Details”,
“type”: “string”,
“fieldType”: “text”
},
{
“name”: “projectdefinition”,
“label”: “Project Definition”,
“type”: “string”,
“fieldType”: “text”
},
{
“name”: “topchallenges”,
“label”: “Top Challenges”,
“type”: “string”,
“fieldType”: “text”
},
{
“name”: “timeframetofundproject”,
“label”: “Timeframe to Fund Project”,
“type”: “string”,
“fieldType”: “text”
}
],
“associatedObjects”: [
“COMPANY”
]
}
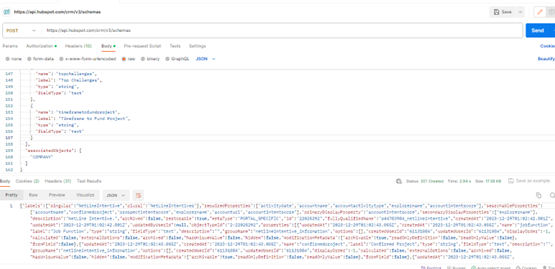
Click Send. If everything worked, you should see Status: 201 Created.
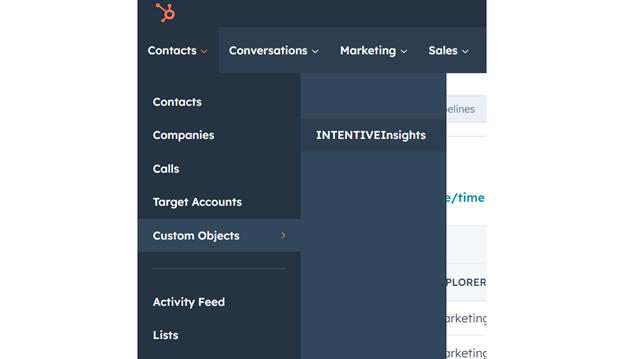
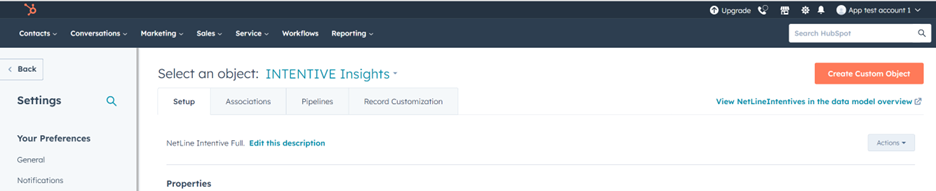
Now back in HubSpot, you should see this new custom object “INTENTIVEInsights” in the Contacts dropdown as shown below:
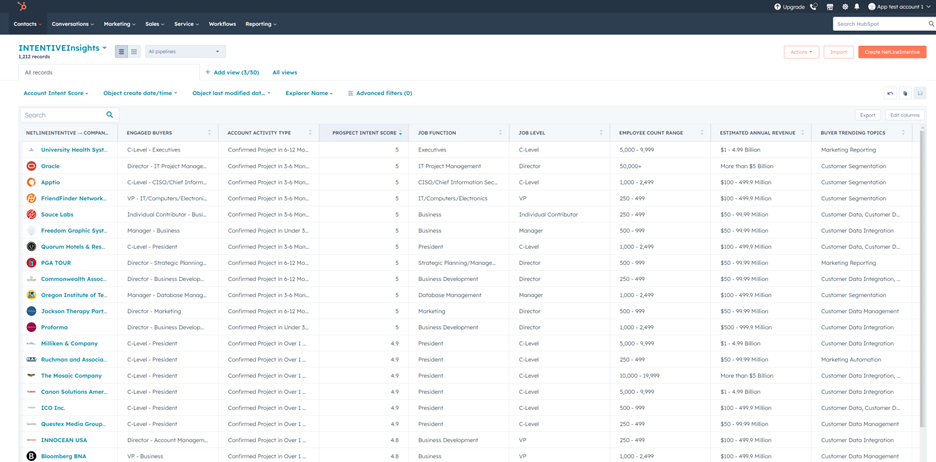
With the custom object set up, you can easily send data from your NetLine INTENTIVE account directly into HubSpot. As with any custom object, you can modify which data fields display, the order, etc. Below is an example:
Create a Custom Object in HubSpot: Manual Method
If you prefer to go the manual route, click on the Settings gear icon in your HubSpot account to get started. Under the Data Management settings, click Custom Objects.
In the example below, we’ve already created the custom object.
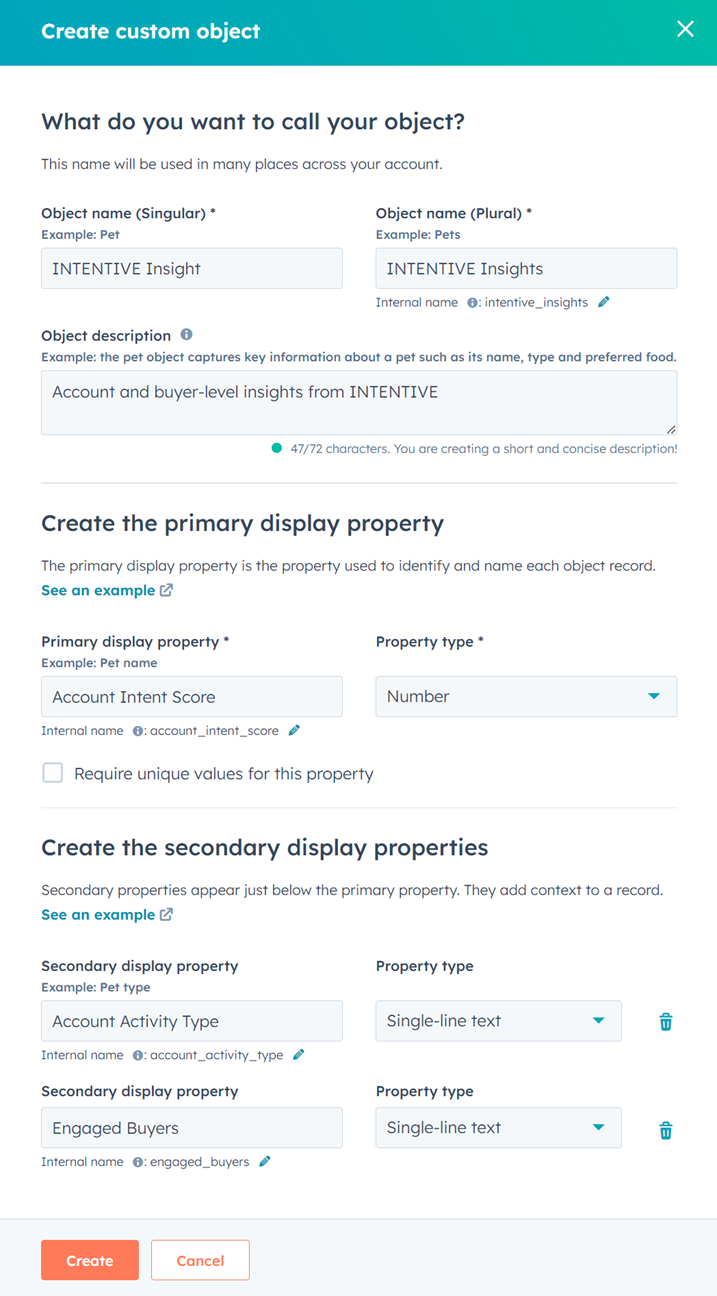
We recommend the following naming conventions, but you can customize this as needed for your account.
- Object name (Singular): INTENTIVE Insight
- Object name (Plural): INTENTIVE Insights
- Object description: Account and buyer-level insights from INTENTIVE
- Primary display property: Account Intent Score (Number)
- Note: Leave the “Require unique values for this property” checkbox unselected
- Secondary display properties:
- Account Activity Type (Single-line text)
- Engaged Buyers (Single-line text)
See the completed example below:
Next, you will need to create a property for each field that you want to receive from INTENTIVE. With over 20 fields, this manual process is tedious, which is why the API method is recommend for easier implementation.
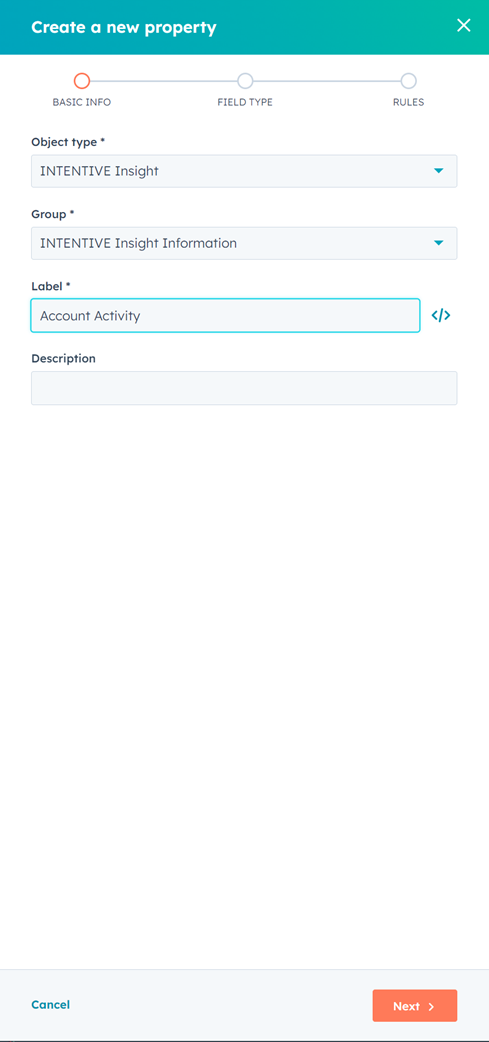
Once you have all data fields created as properties, you are ready to set up the integration in the NetLine Portal.
Complete the Integration Set Up
1. In the NetLine Portal, navigate to the Manage Integrations page within the Intentive section. 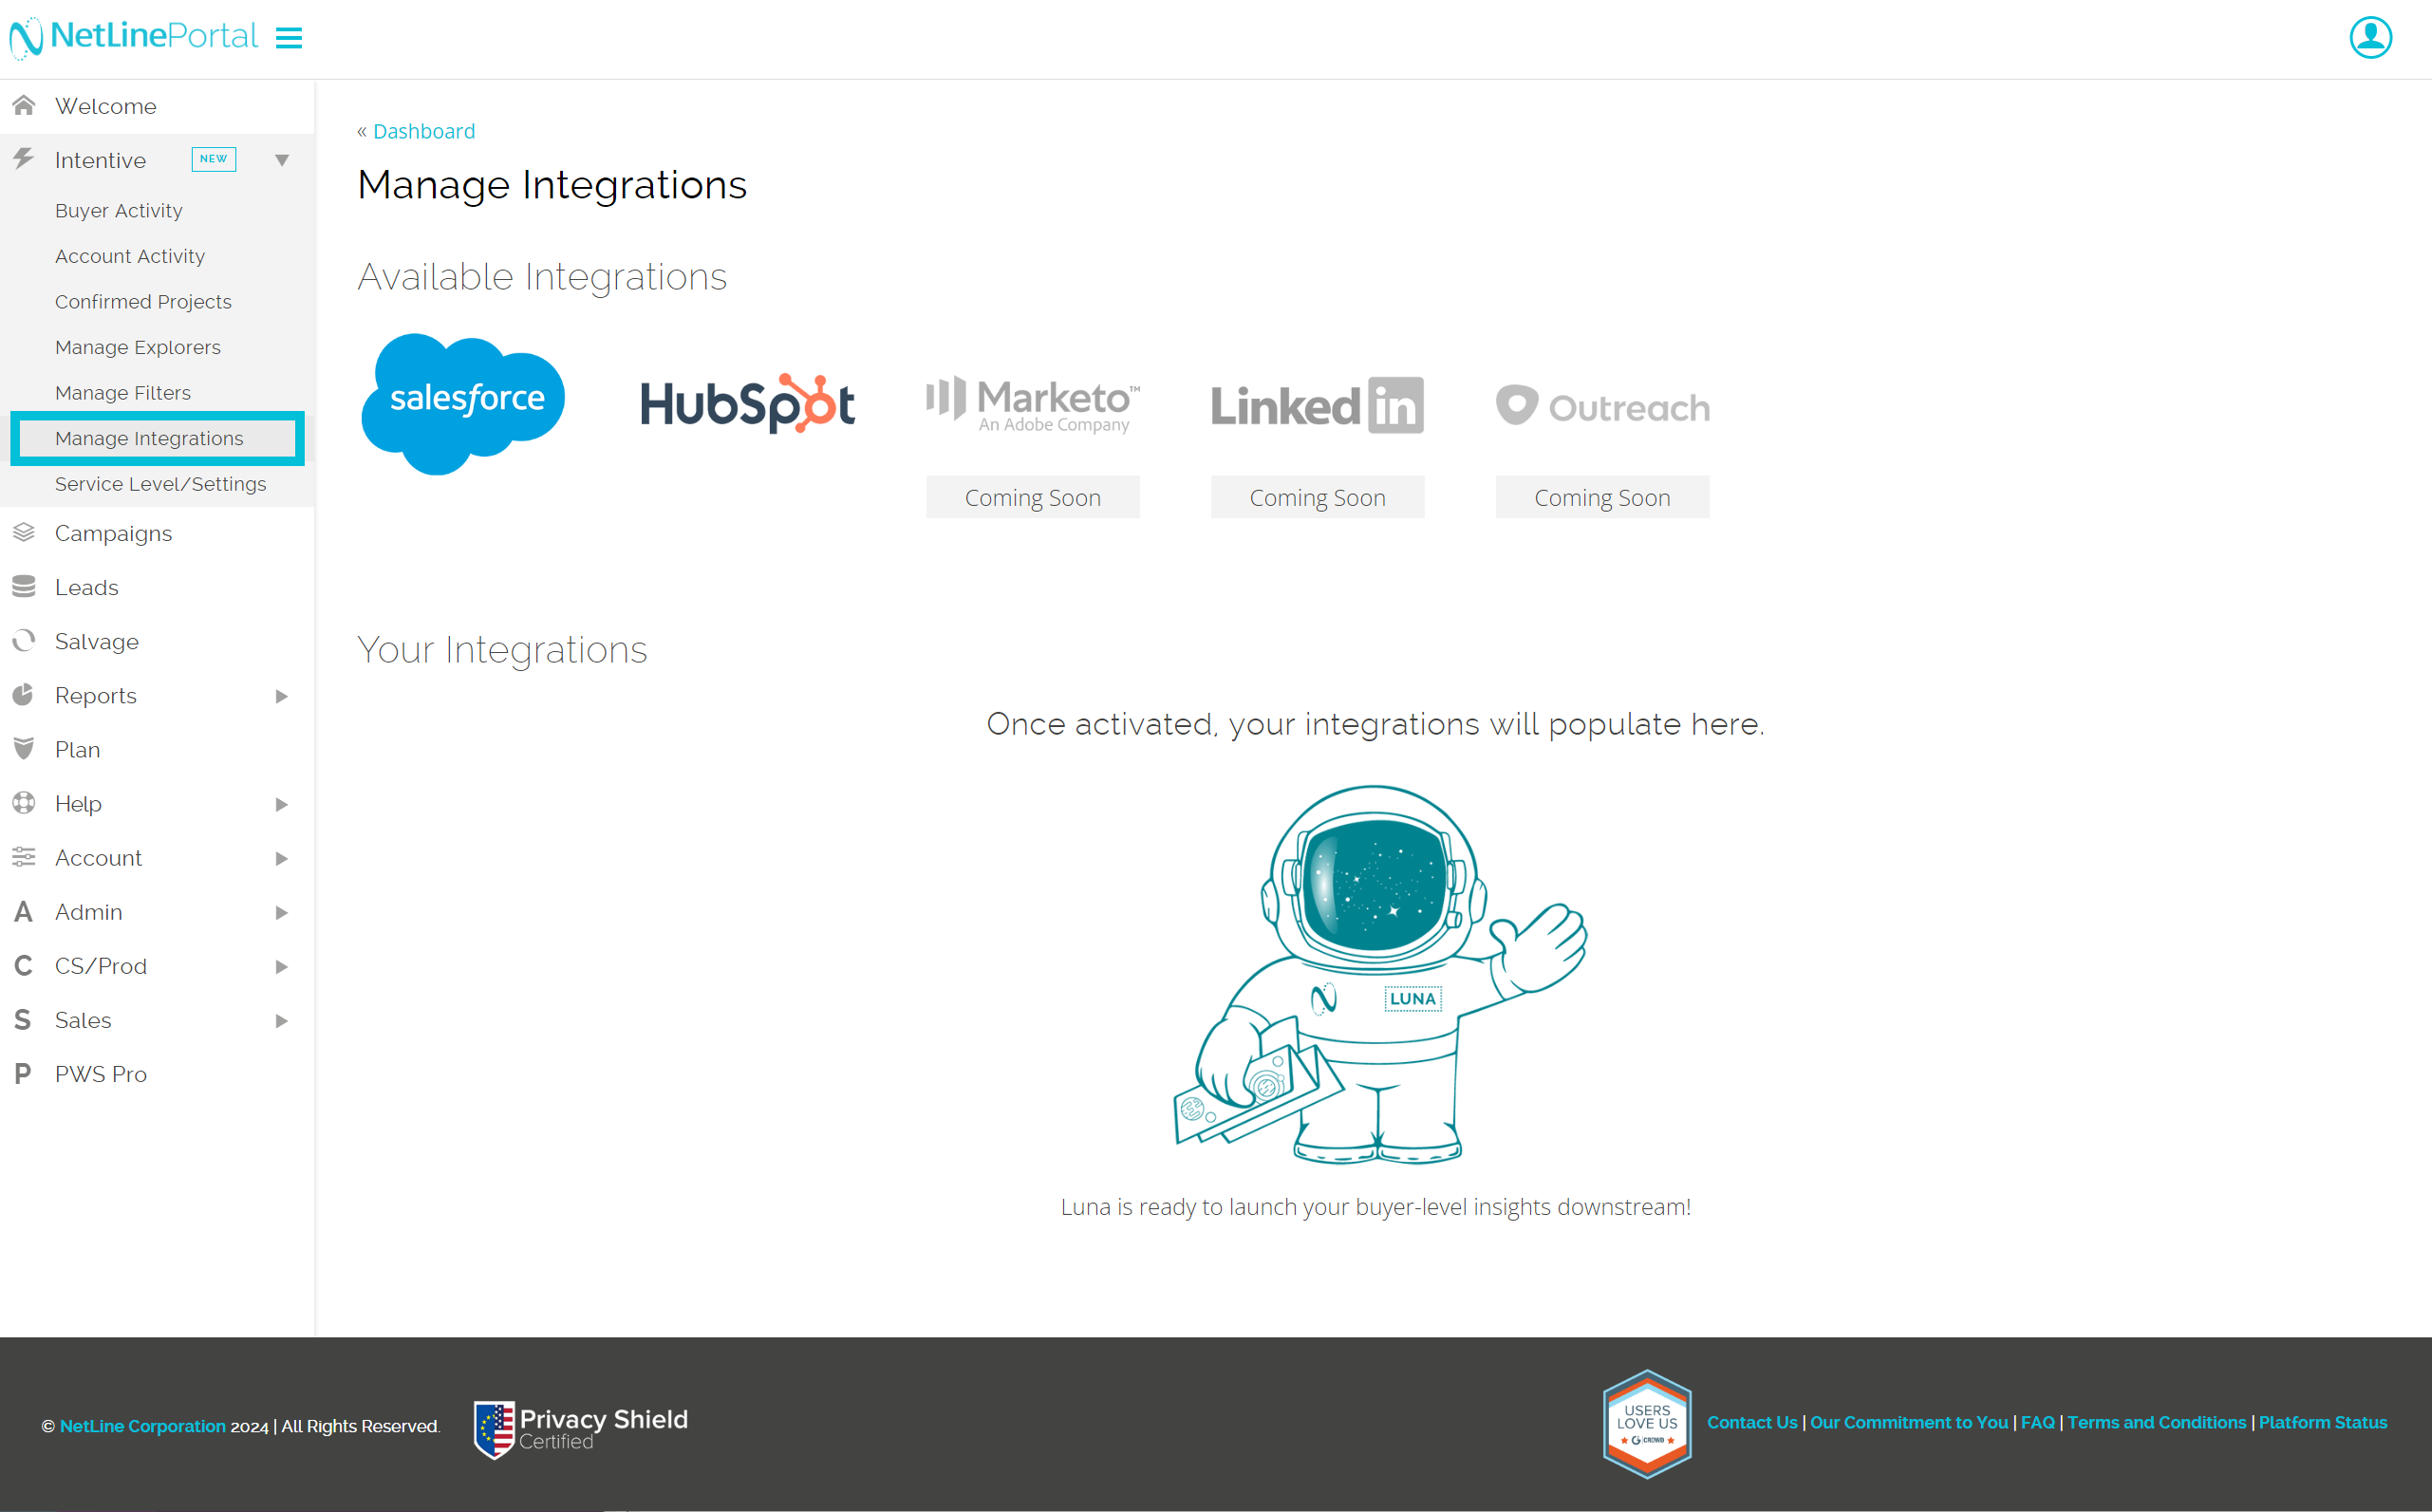
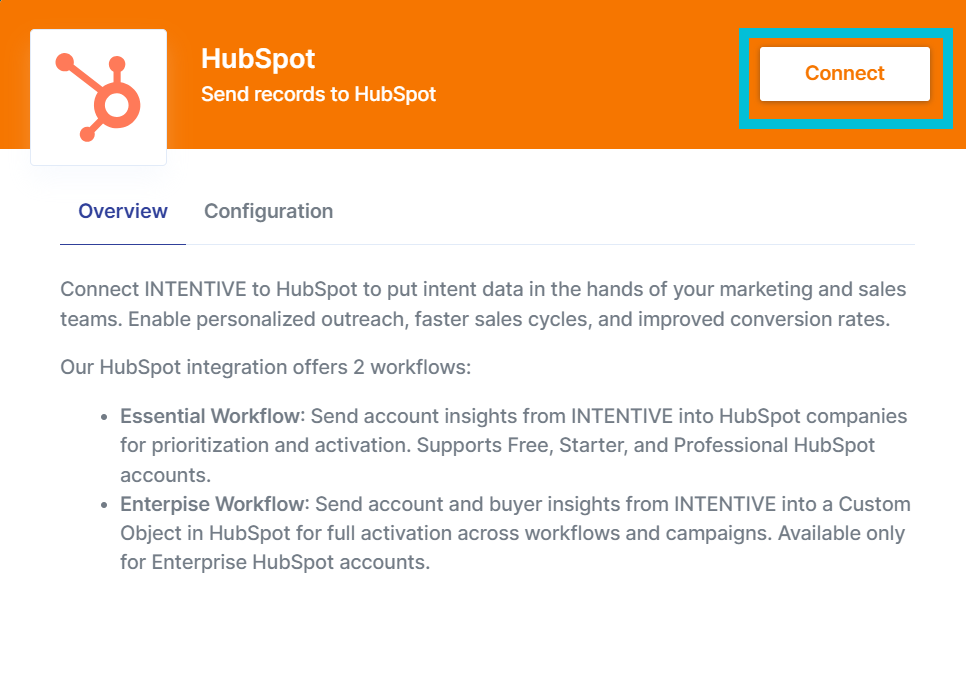
2. Select the HubSpot logo to begin.
3. Click Connect on the pop-up window to authorize the integration.
4. On the Configuration tab of the pop-up modal, toggle on the Enterprise Workflow.
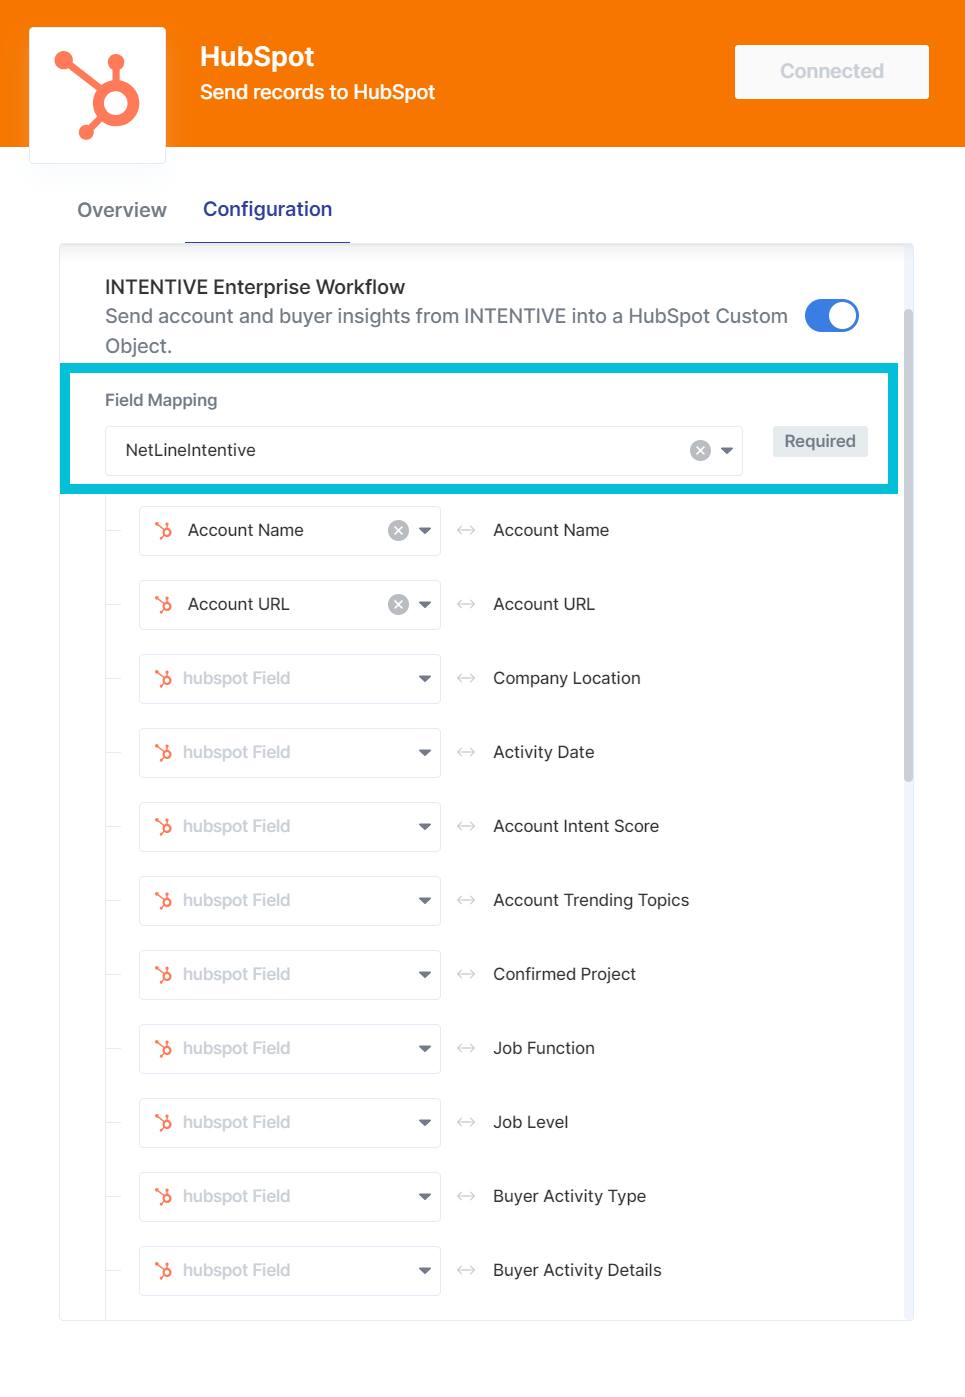
5. Proceed with the field mapping for your HubSpot integration.
- On the left-hand side, select the HubSpot Fields (the properties in your Custom Object).
- On the right-hand side, you’ll see the NetLine INTENTIVE fields.
- For the full list of NetLine fields, see the list at the end of this document.
6. Close the pop-up window (note: your selections are auto-saved), and return to the Authorize the HubSpot Integration page within NetLine. Click Submit to continue.
7. Next, select which Explorer you want to send data from. At this time, you can send 1 Explorer per INTENTIVE Account to HubSpot.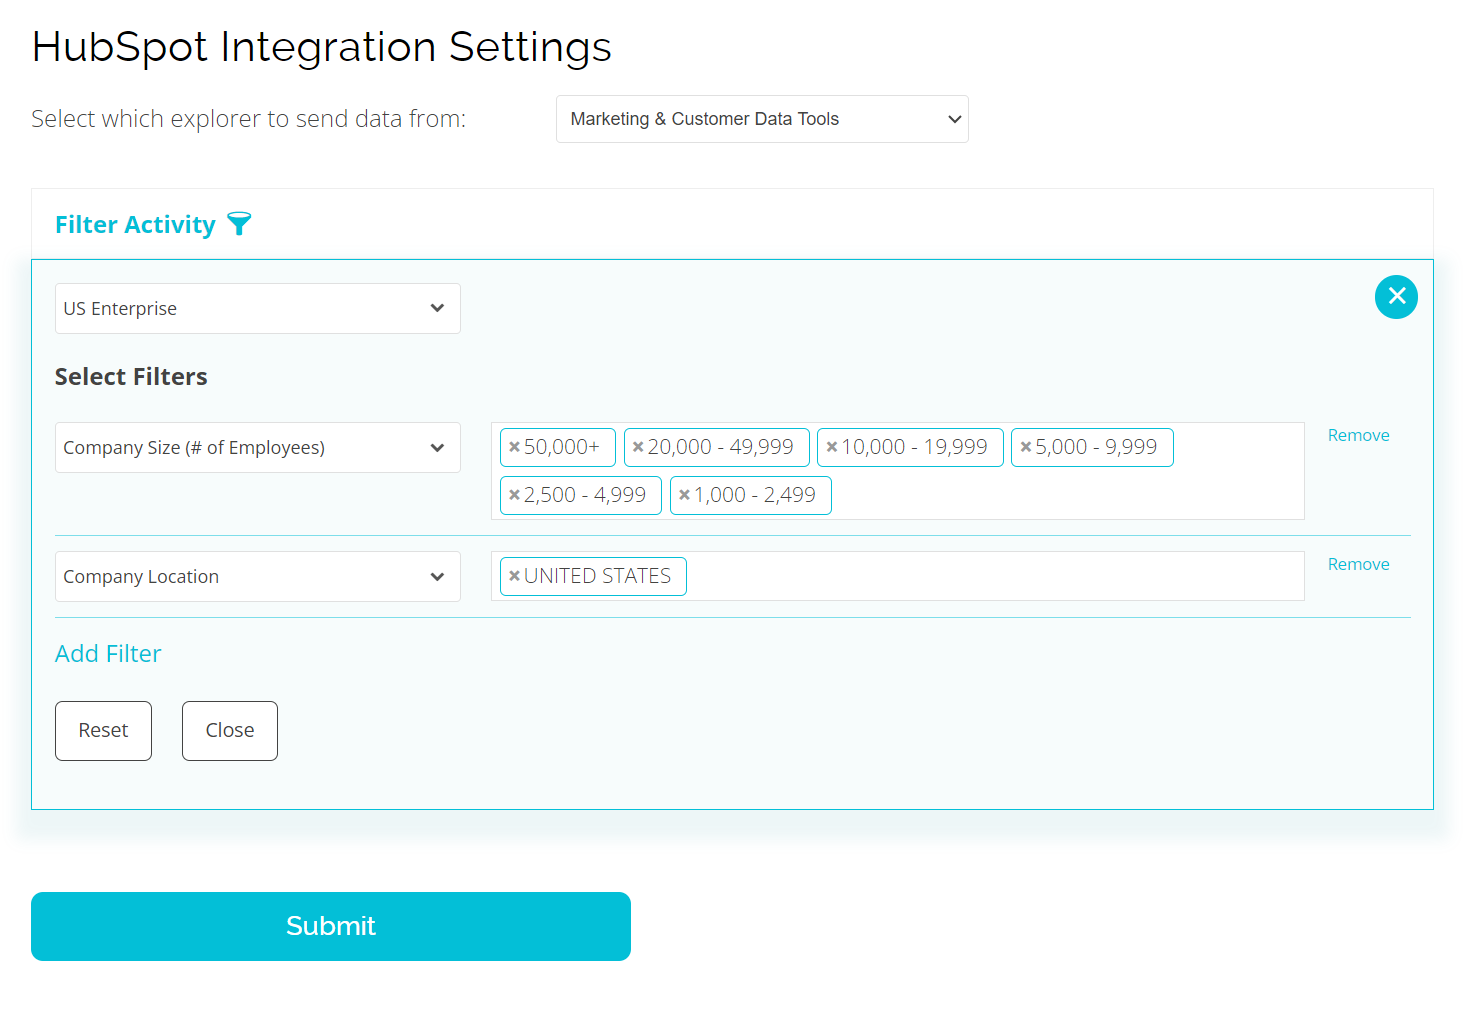
8. Apply any Filters that you want to narrow the data set send to HubSpot. You can adjust these filters at any time.
- Note that integration filters are kept separate from standard filters to protect your data sync.
9. Click Submit when you are ready.
10. You will return to the Manage Integrations page and see your newly activated HubSpot connection. Data will be sent during the next sync time. You will see data populate in your HubSpot account within 24-48 hours.
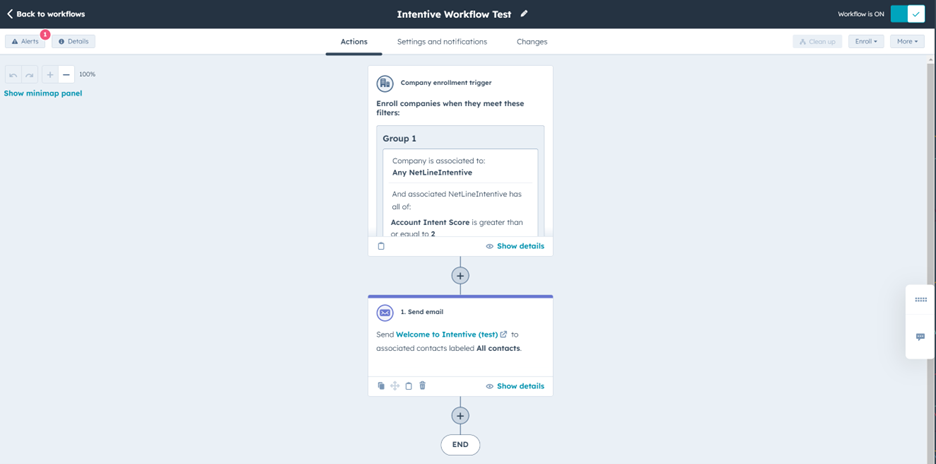
After the initial historical backfill of the last 90 days of data, NetLine will send new data on a daily basis to your HubSpot account. With these insights, you can build campaigns and workflows in HubSpot that leverage INTENTIVE fields.
Below is a simple workflow example that sends an email to any company with an account intent score greater than 2.
More Resources
If you have questions or need help setting up the integration, please contact your Customer Success representative or email intentive-support@netline.com. We are here to help!
For additional ways to activate your INTENTIVE Insights, check out the following documentation:
- How to Discover New Buyers and Accounts with INTENTIVE
- How to Connect INTENTIVE Insights to Salesforce
For additional information on HubSpot Custom Objects, see the following HubSpot resources:
Here is a complete list of all INTENTIVE fields:
| Field Name | Type |
| Account Name | String |
| Account URL | String |
| Company location | String |
| Activity Date | Date |
| Account Intent Score | Number |
| Account Trending Topics | String |
| Account Activity Types | String |
| Confirmed Project | String |
| Job Function | String |
| Job Level | String |
| Buyer Activity Type | String |
| Buyer Activity Details | String |
| Prospect Intent Score | Number |
| Buyer Trending Topics | String |
| Top Challenges | String |
| Timeframe to Fund Project | String |
| Explorer Name | String |
| Explorer ID | Number |
| Engaged Buyers | String |
| Employee Count Range | String |
| Industry | String |
| Estimated Annual Revenue | String |