Overview
Integrating NetLine with Marketo allows leads captured through your NetLine campaigns to automatically flow into your Marketo marketing automation platform (MAP), saving time and enabling instant follow-up. The setup is quick and requires no coding.
This guide will walk you through the two main parts of this process:
- Setting up the Marketo REST API: Creating the necessary credentials and users within your Marketo account.
- Configuring the NetLine Portal Connector: Using the credentials from Marketo to set up the lead fulfillment on NetLine’s end.
Once complete, every lead generated through NetLine will appear in your Marketo MAP automatically, where you can nurture, assign to sales, or include them in campaigns.
Part 1: Setting Up Your Marketo REST API
Before you can connect the two platforms, you need to create the API credentials in Marketo.
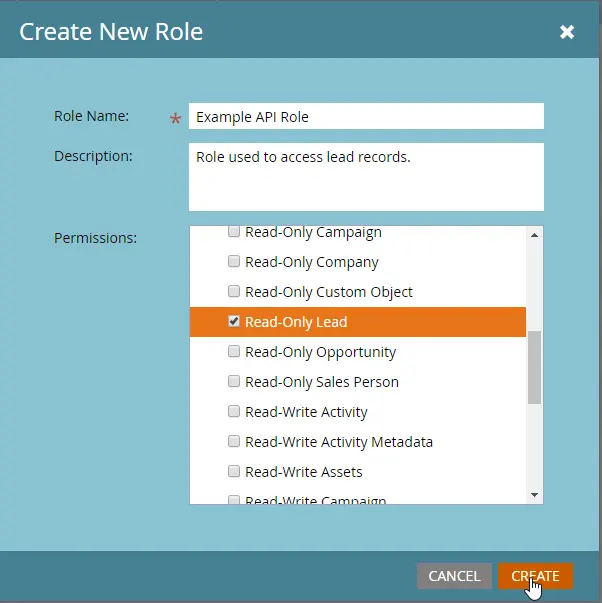
Step 1: Create a New Role
- Log in to your Marketo instance.
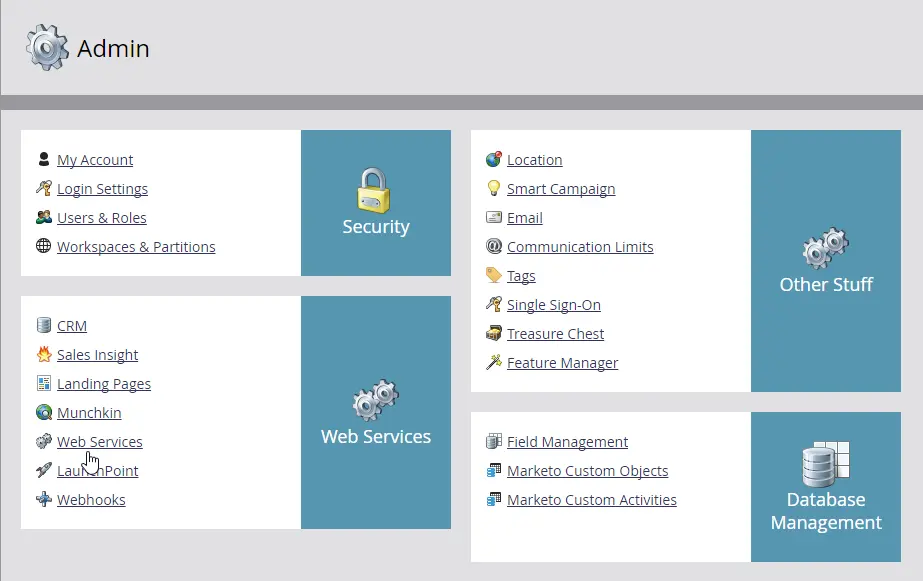
- Go to the Admin menu.
- Select Users & Roles.
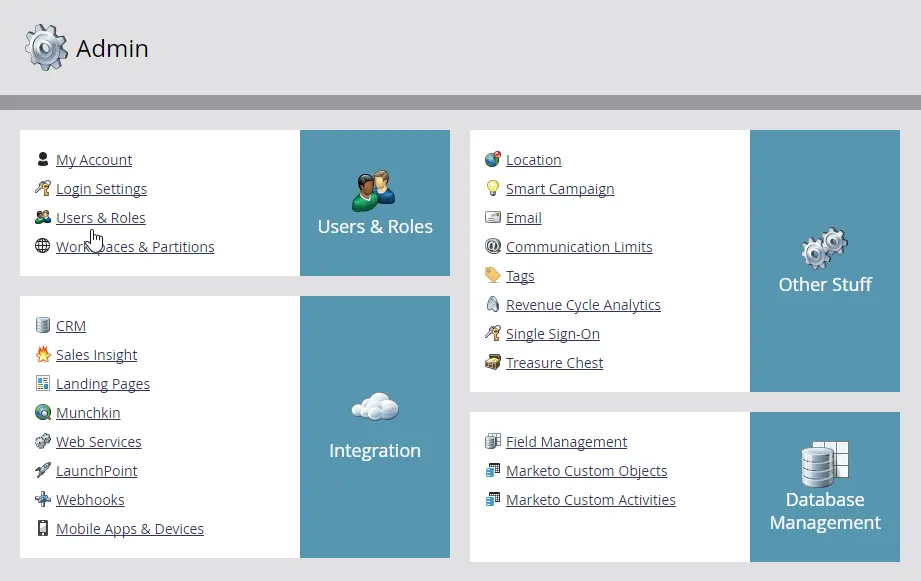
- Click on the Roles tab, then New Role.
- Give the role a descriptive name (e.g., “NetLine API Role”).
- In the Permissions section, expand the Access API group.
- Check the box for “Read-Only Lead” (or “Read-Only Person”).
- Note: If you want to post data to the Marketo database, you must also enable “Write access” for the connector.
- Click Create.
Step 2: Create a New API-Only User
- Return to the Users tab and click on Invite New User.
- Provide a descriptive name (e.g., “API User”) and an email address.
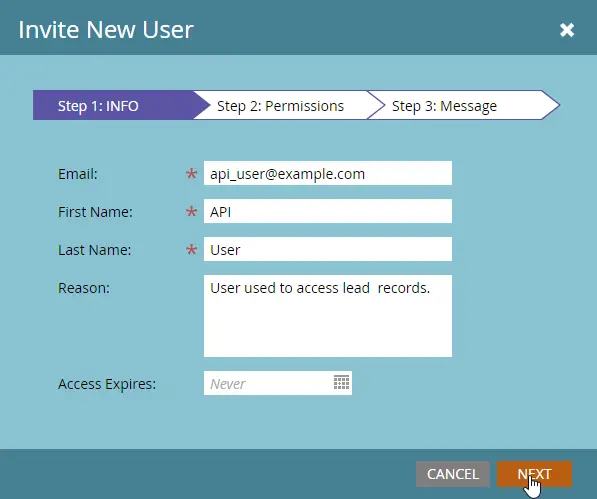
- Click Next.
- In the permissions section, check the API Only box.
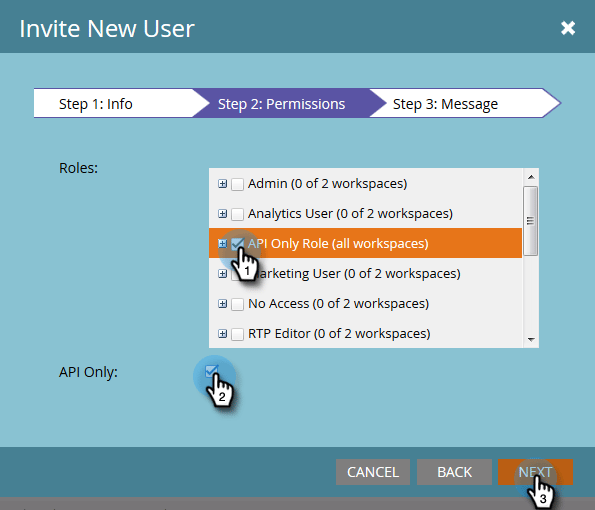
- Assign the API role you just created to this user.
- Click Next, then Send to complete the user creation.

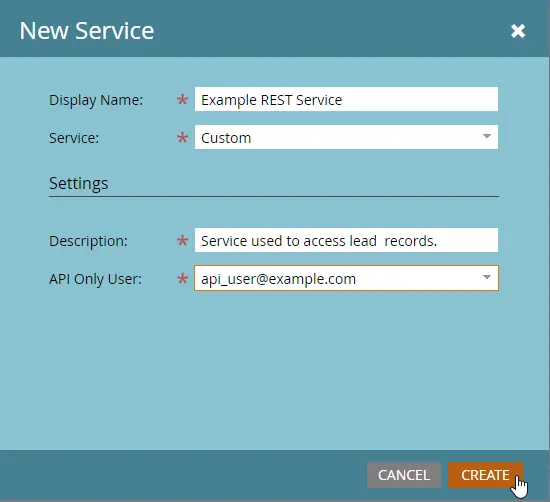
Step 3: Create a New Custom Service
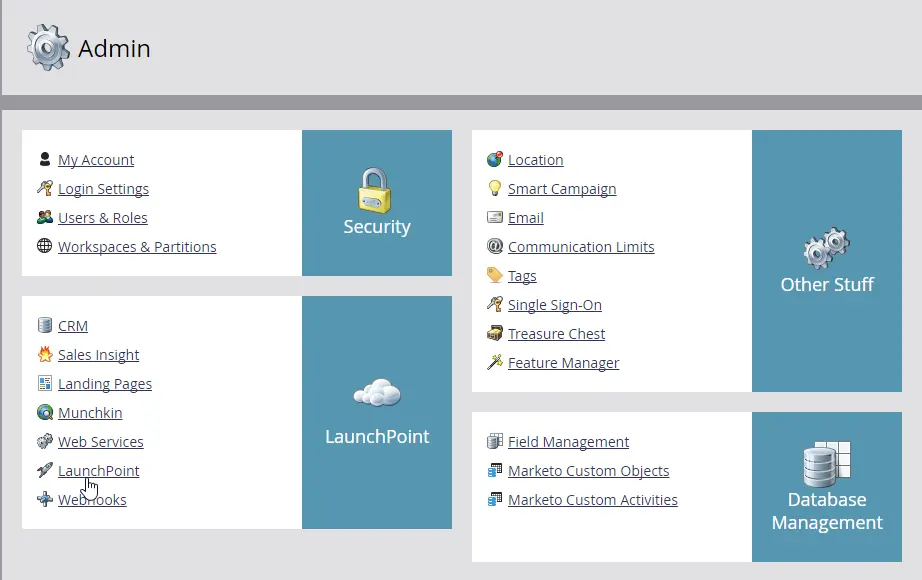
- Go back to the Admin menu.
- Select LaunchPoint
- Click on the New menu and choose New Service.
- Give the service a descriptive name.
- From the Service dropdown menu, select Custom.
- Add a description.
- From the API Only User dropdown menu, select the API user you created in the previous step.
- Click Create.
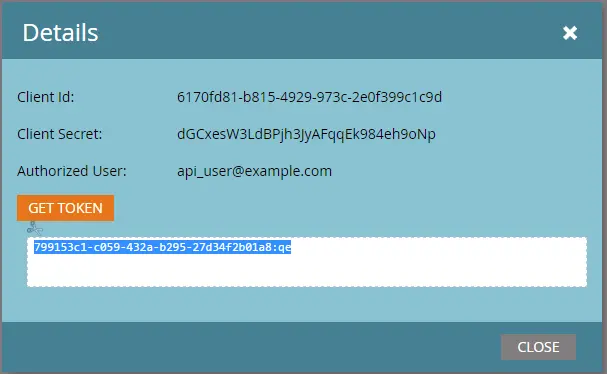
Step 4: Retrieve Your API Credentials
- For the new service you just created, click View Details.
- This will display your Client ID and Client Secret. Save these credentials in a secure place, as they will be needed for the NetLine Portal setup.
Step 5: Get Your Marketo POST URL and Field Names
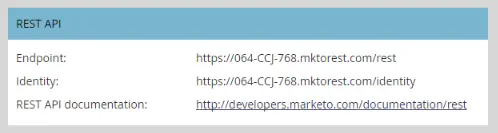
- In Marketo, go to Admin > Integration > Web Services.
- Under the REST API section, find the Endpoint URL. The standard format for the POST URL is
- https://<MunchkinId>.mktorest.com/rest/v1/leads.json.
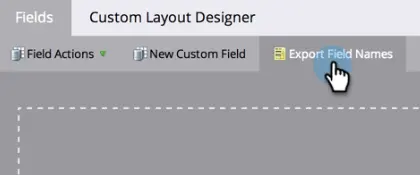
- To get your field names, go to Admin > Field Management.
- Click Export Field Names to download an .xls file. This file contains the API names for all your fields, which are crucial for correctly mapping them in the NetLine Portal.
Part 2: Login To NetLine Portal
Now that you have your Marketo credentials, you can set up the connector in the NetLine Portal.
Step 1: Access the Fulfillment Settings
- Open portal.netline.com and log in with your account credentials.
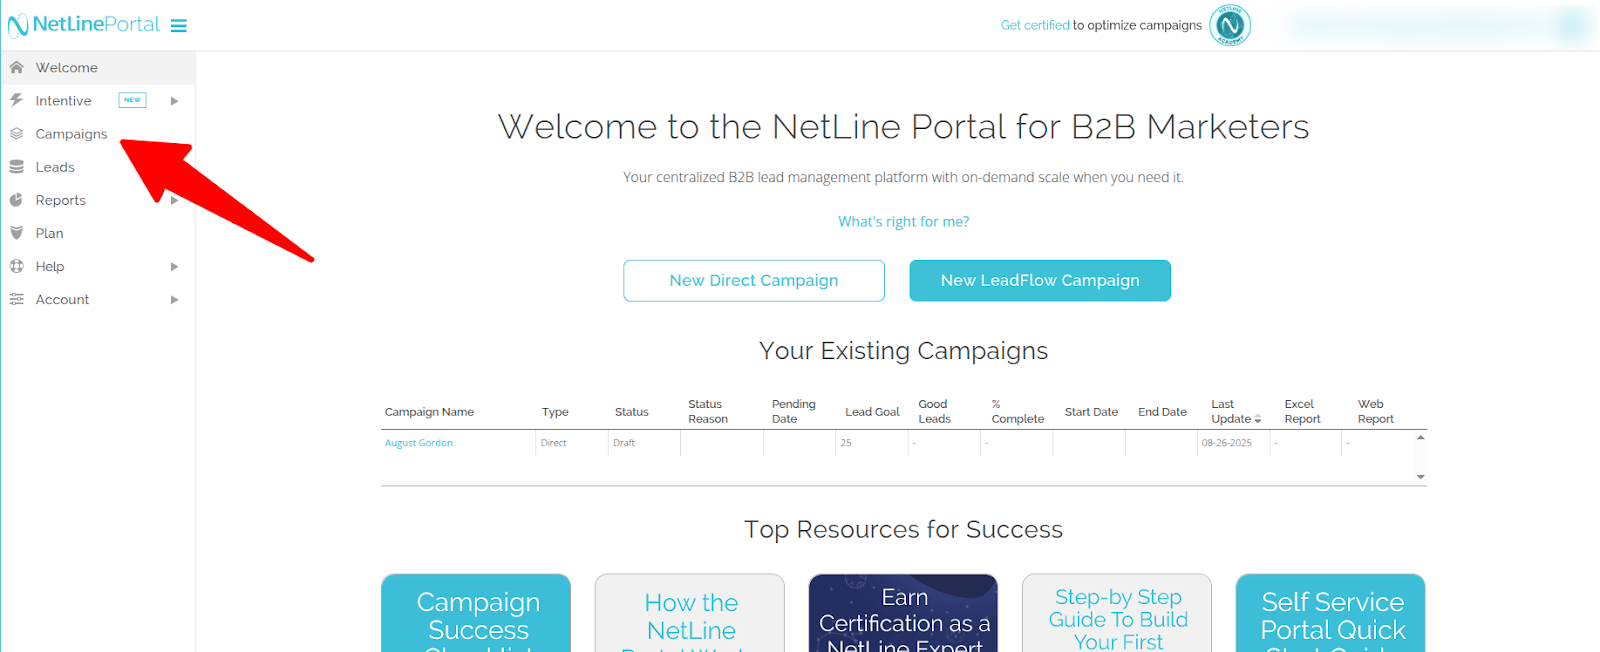
- Once logged in, you’ll land on your NetLine Dashboard.
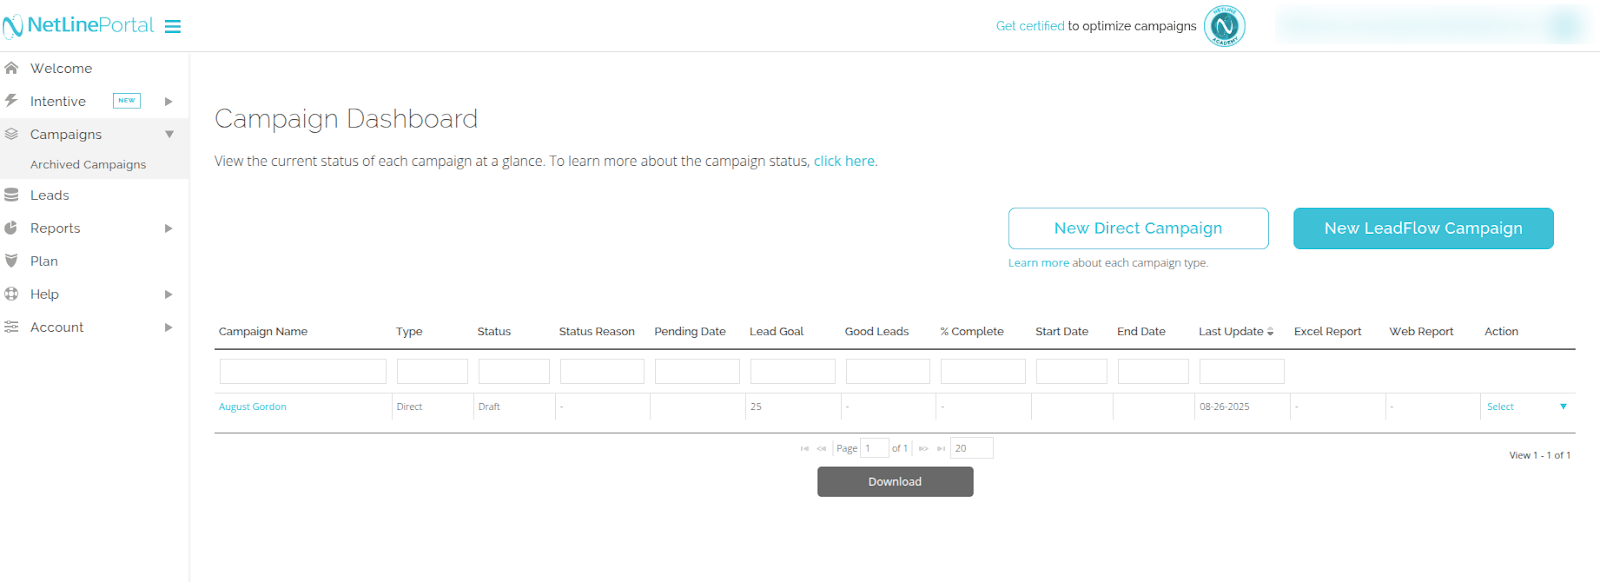
- From the left-hand sidebar, click on Campaigns.
- From the list of campaigns, choose the one you’d like to connect with Marketo.
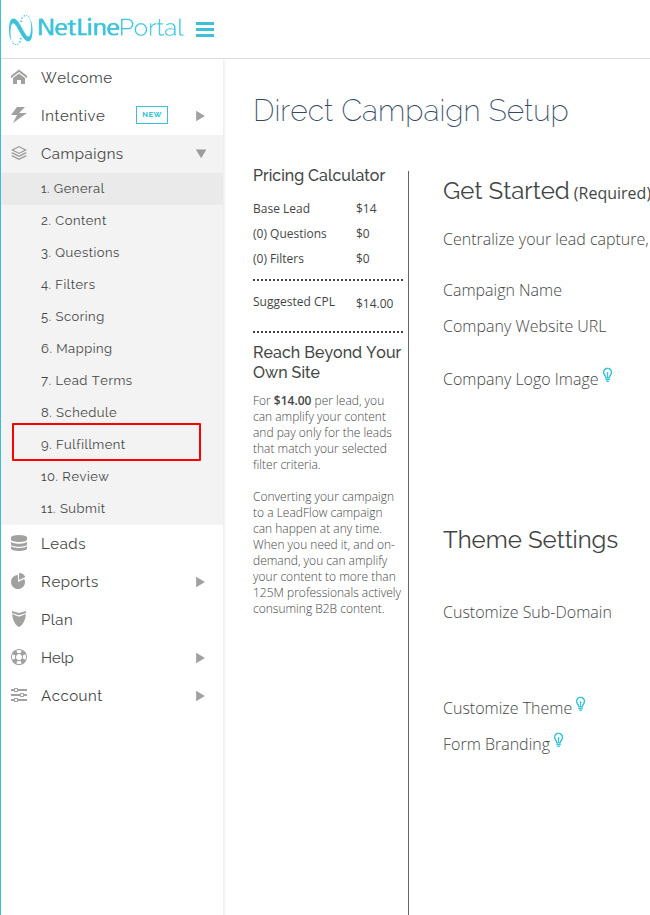
- After setting up the campaign, click on Fulfillment in the left-hand menu (under Campaigns).
- Go to the Connector Fulfillment section.
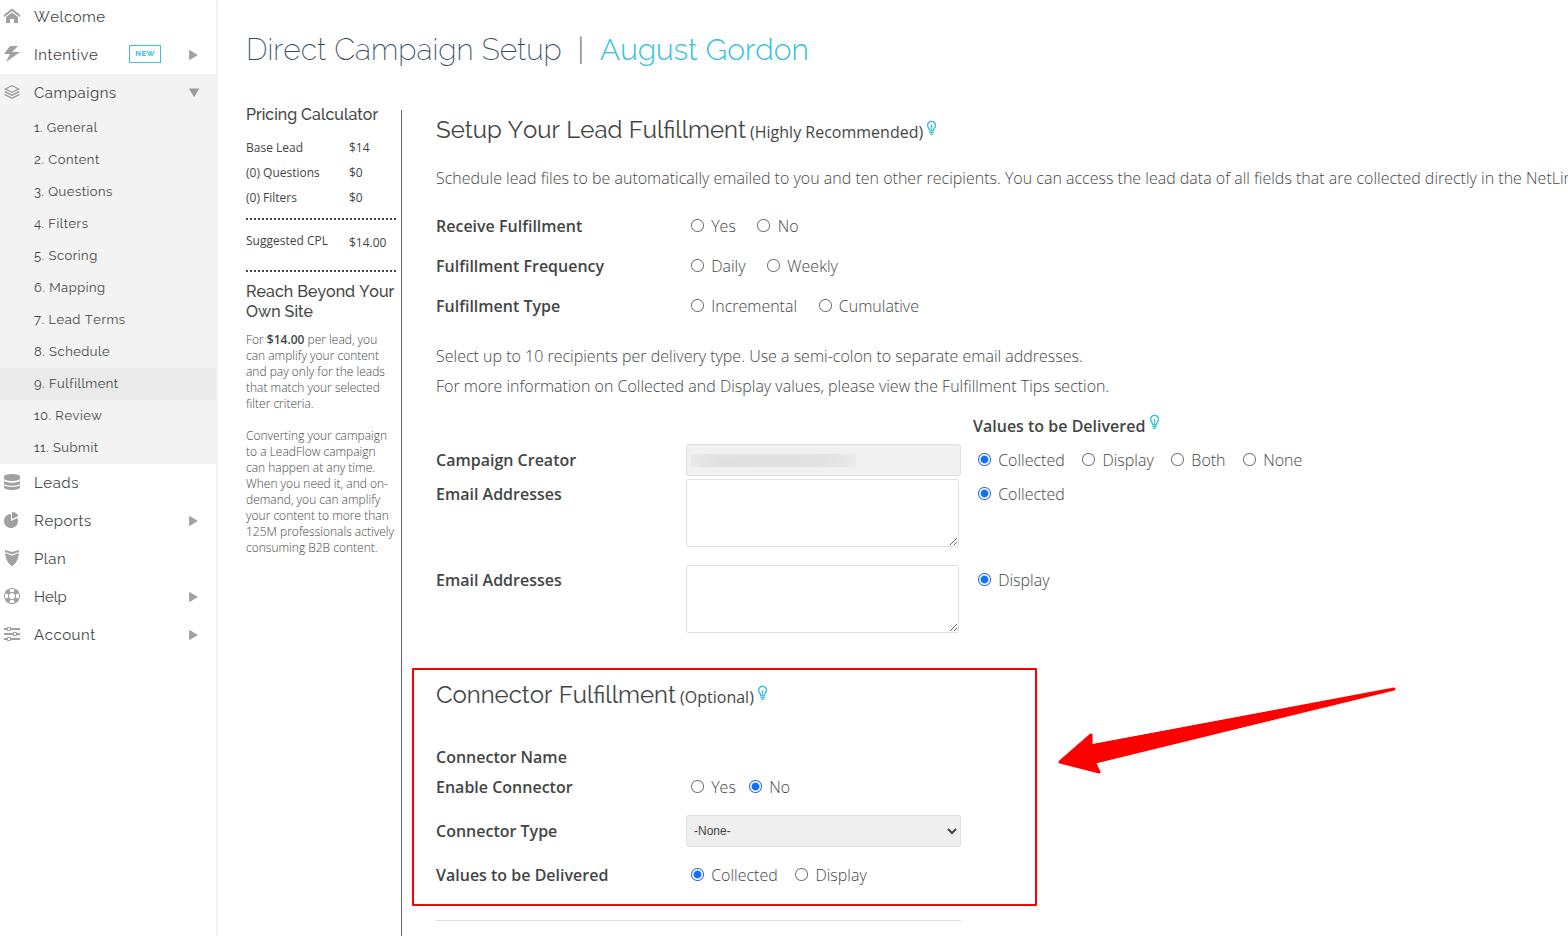
- Toggle Enable Connector to Yes.
- In the Connector Type dropdown, select Rest Marketo.
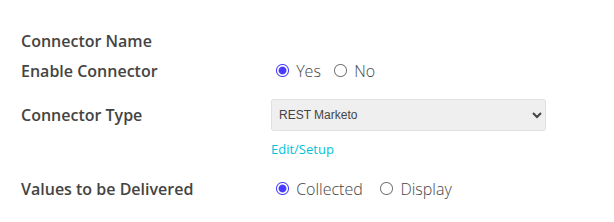
- Click Edit/Setup — this will open a popup window with configuration settings.
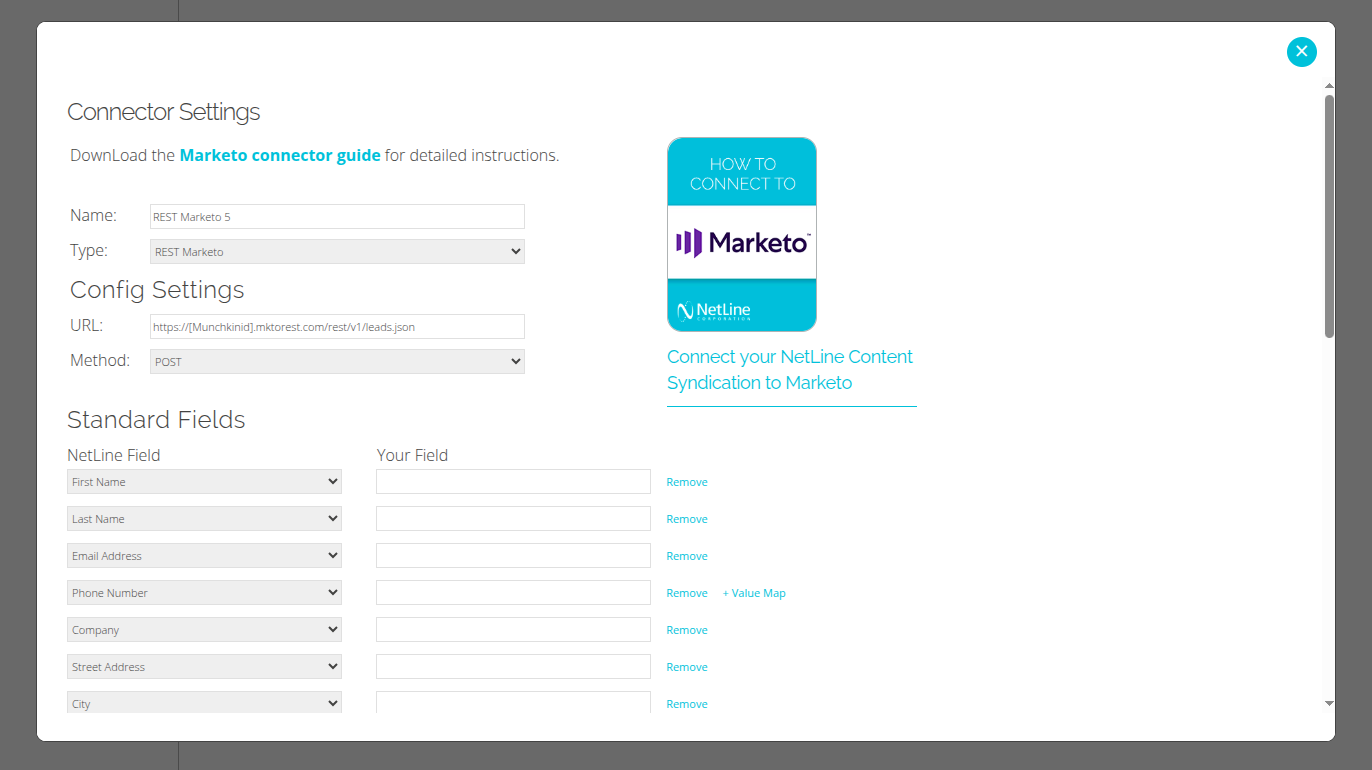
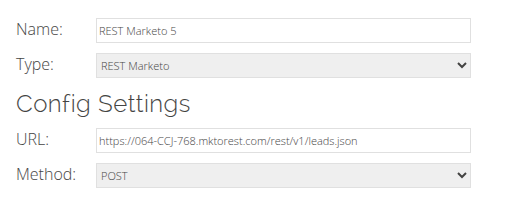
Step 2: Enter the POST URL
- In the Post URL field, enter the Marketo REST API URL you retrieved in Part 1. The standard format is
- https://<MunchkinId>.mktorest.com/rest/v1/leads.json.
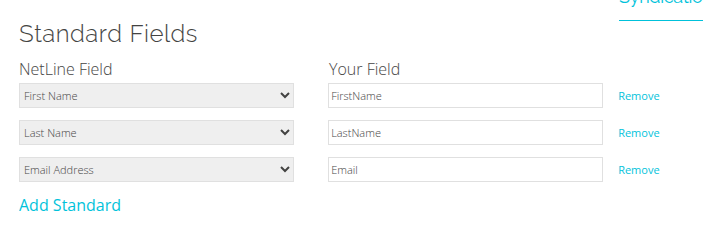
Step 3: Map Your Fields
- In the Standard Fields section, you will see NetLine fields on the left.
- Use the Marketo field names you exported in Part 1 to match them with the corresponding NetLine fields on the right.
- Use the Marketo API names to ensure an exact, case-sensitive match.
- Note: If you are mapping numberOfEmployees or annualRevenue, Marketo expects an integer value. If you need to pass a string, you will need to create a custom field in Marketo for this purpose.
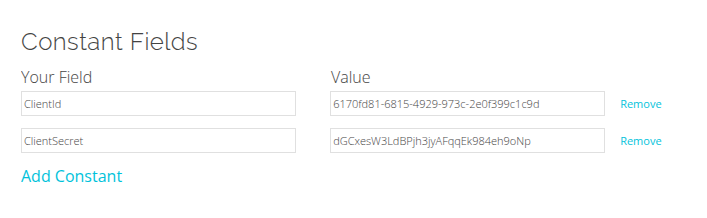
Step 4: Configure Custom and Constant Fields
- Custom Questions Fields: If you have custom questions in your NetLine campaign, you can map them to existing custom fields in Marketo.
- Constant Fields: This is a critical step for Marketo. You must add ClientId and ClientSecret as constant fields and enter the values you retrieved from Marketo.
- Constant fields allow you to send additional data where the value remains the same for every lead.
Step 5: Test the Connection
- Once you have completed the field mapping, click Submit to save the setup.
- Return to the Portal screen and click on Send Test.
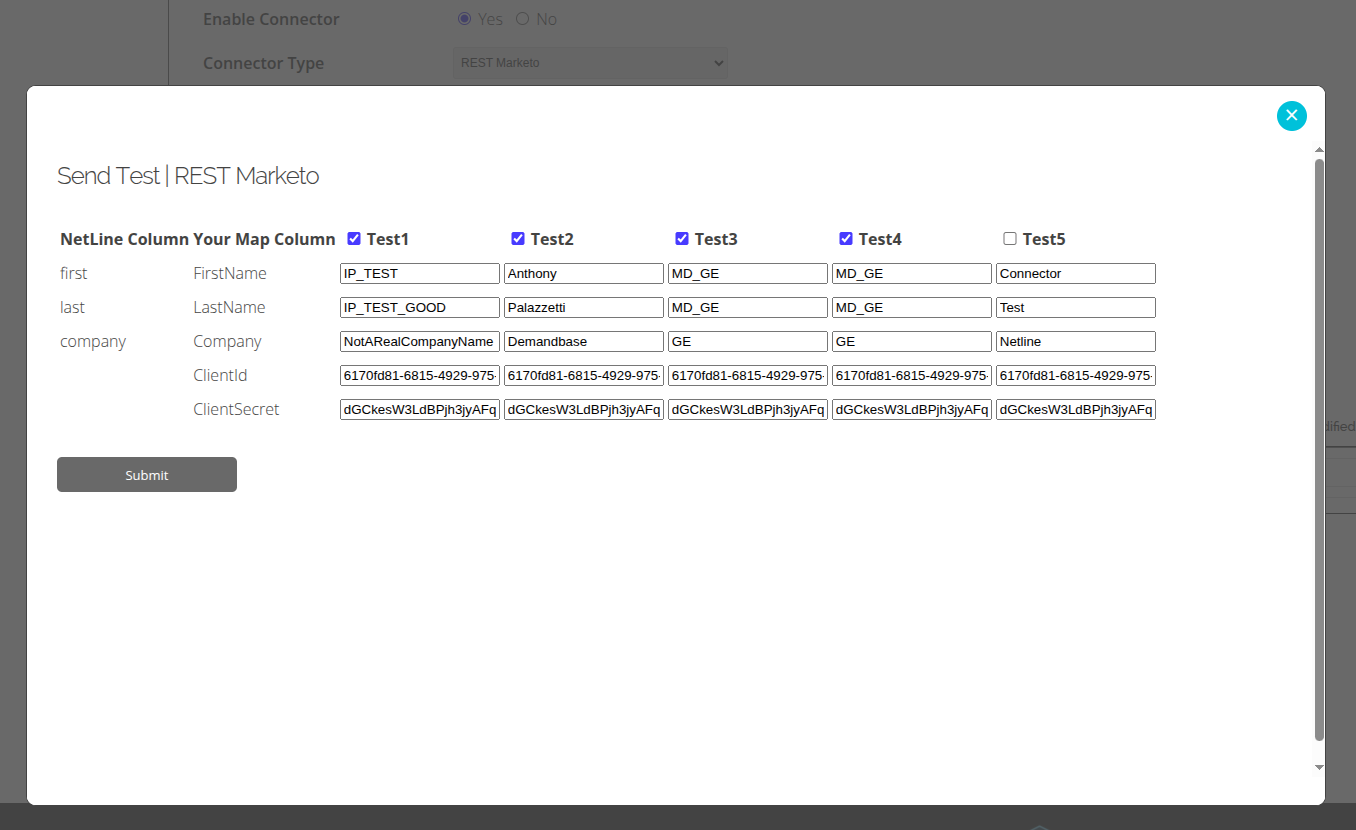
- This will send a test lead into your Marketo account.
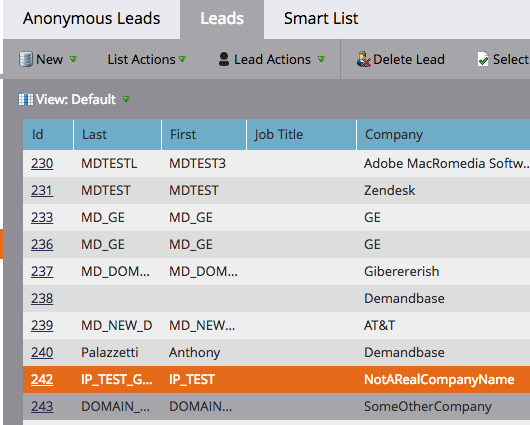
- Go to Marketo and search for the test record (the easiest way is by email address). The test record should appear within a minute or two if the configuration is correct.
If the test leads don’t appear within a few minutes, check your field mapping formatting to ensure the characters match exactly. Missing underscores, uppercase, and lowercase characters can throw off the connection.
Also, if you’ve added custom fields in your NetLine form, make sure they have a place to go in Marketo by creating a Custom Property.
If you get stuck, send a note to portal-support@netline.com — we’ll help get you on your way in no time.