Integrating NetLine with Salesforce allows leads captured through your NetLine campaigns to automatically flow into your Salesforce, saving time and enabling instant follow-up. The setup is quick and requires no coding.In this guide, you’ll:
Create a form in Salesforce to serve as the entry point for your NetLine leads.
Copy the form’s details from Salesforce.
Add those Salesforce details into NetLine as a connector.
Map fields between NetLine and Salesforce to ensure data matches correctly.
Send a test lead to confirm the integration is working.
Once complete, every lead generated through NetLine will appear in your Salesforce automatically, where you can nurture, assign to sales, or include them in campaigns.
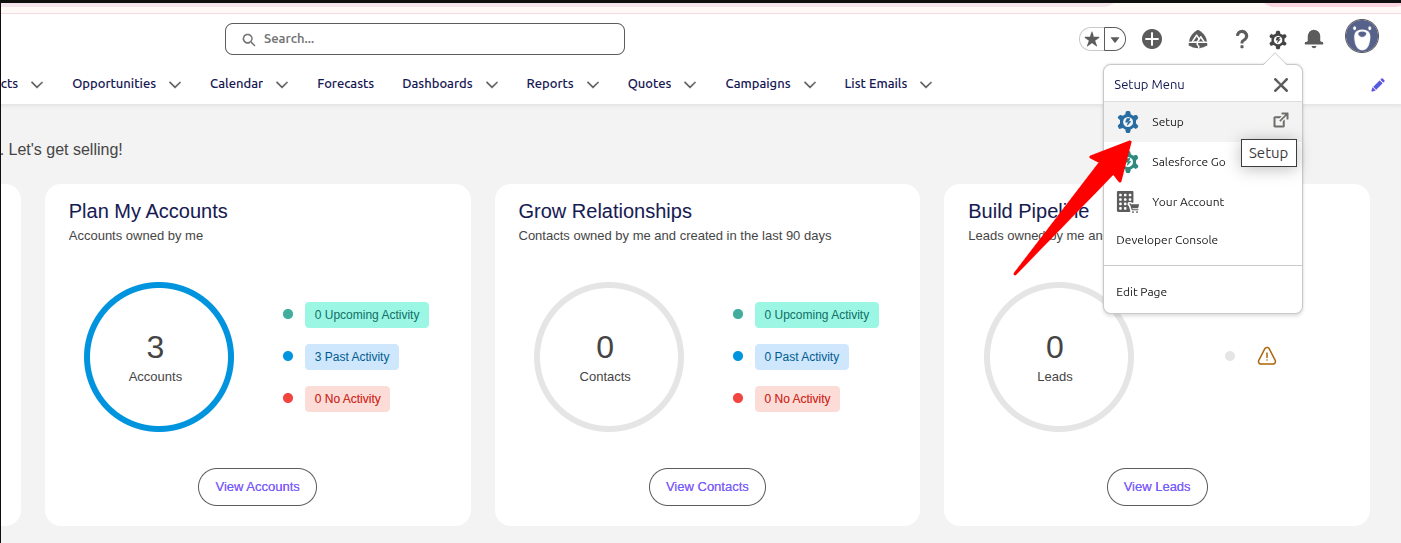
From your Salesforce Dashboard, click Setup in the top navigation menu.
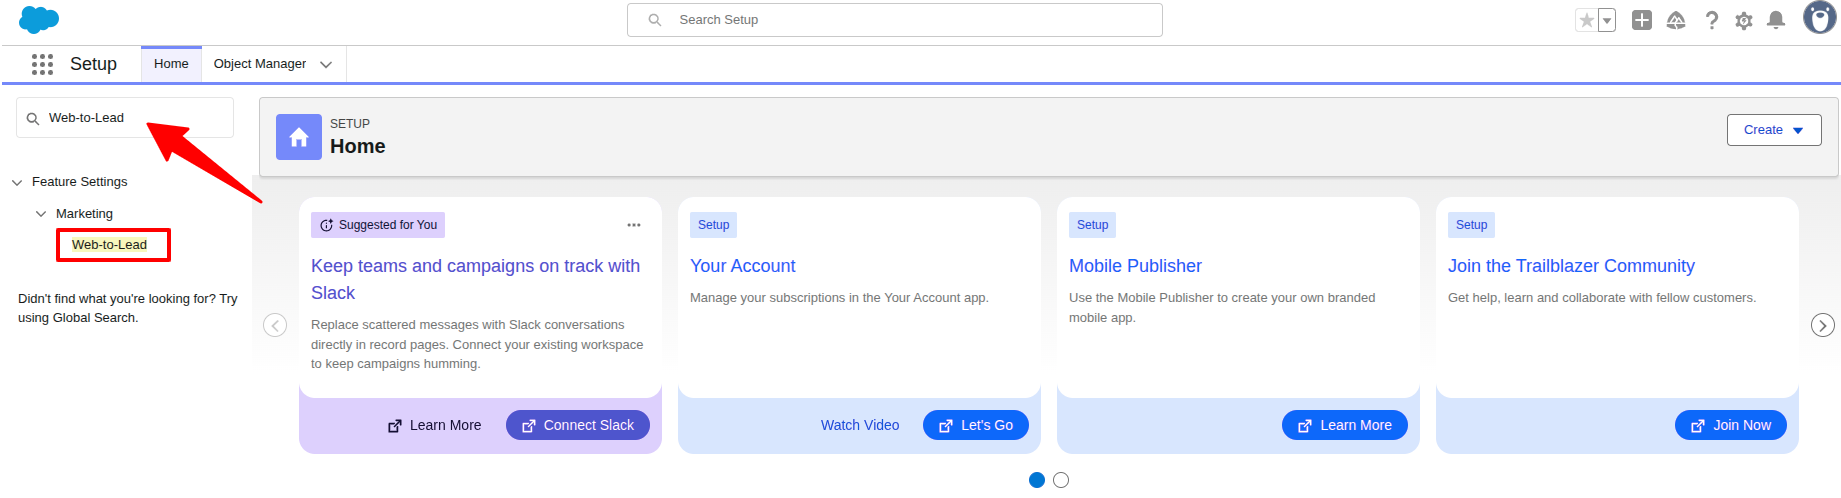
In the Setup search bar (left side), type Web-to-Lead and select it from the results.
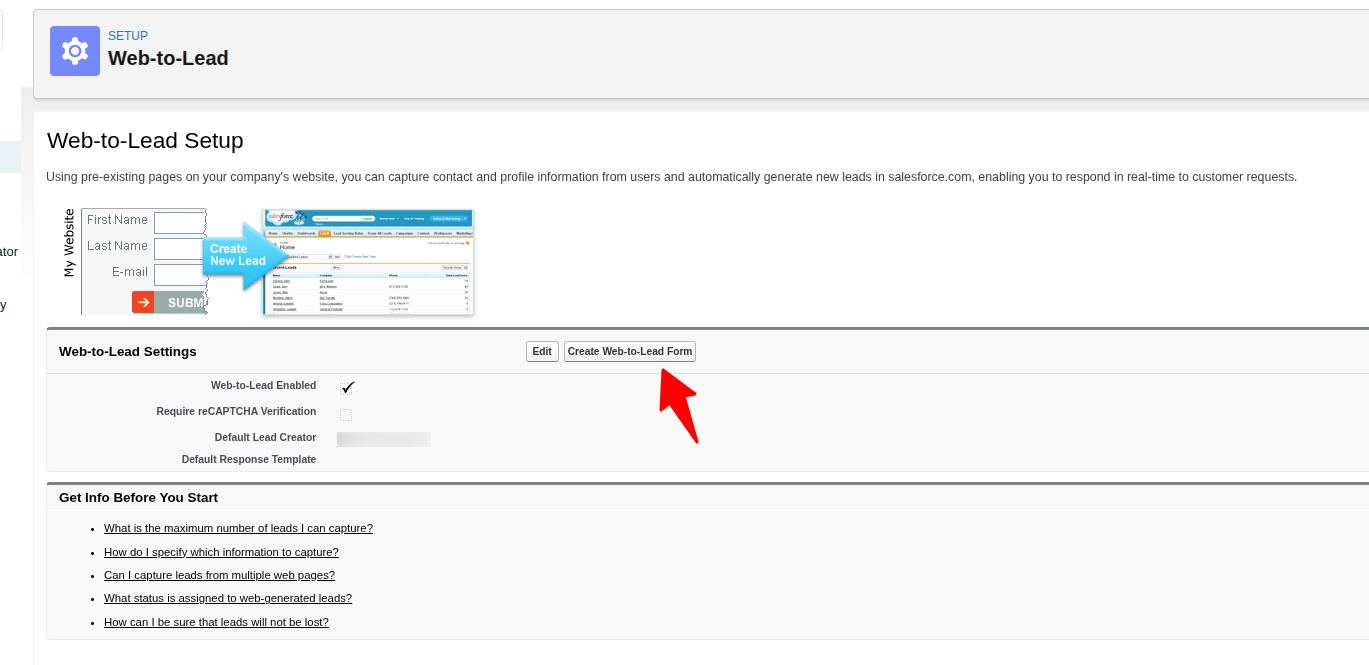
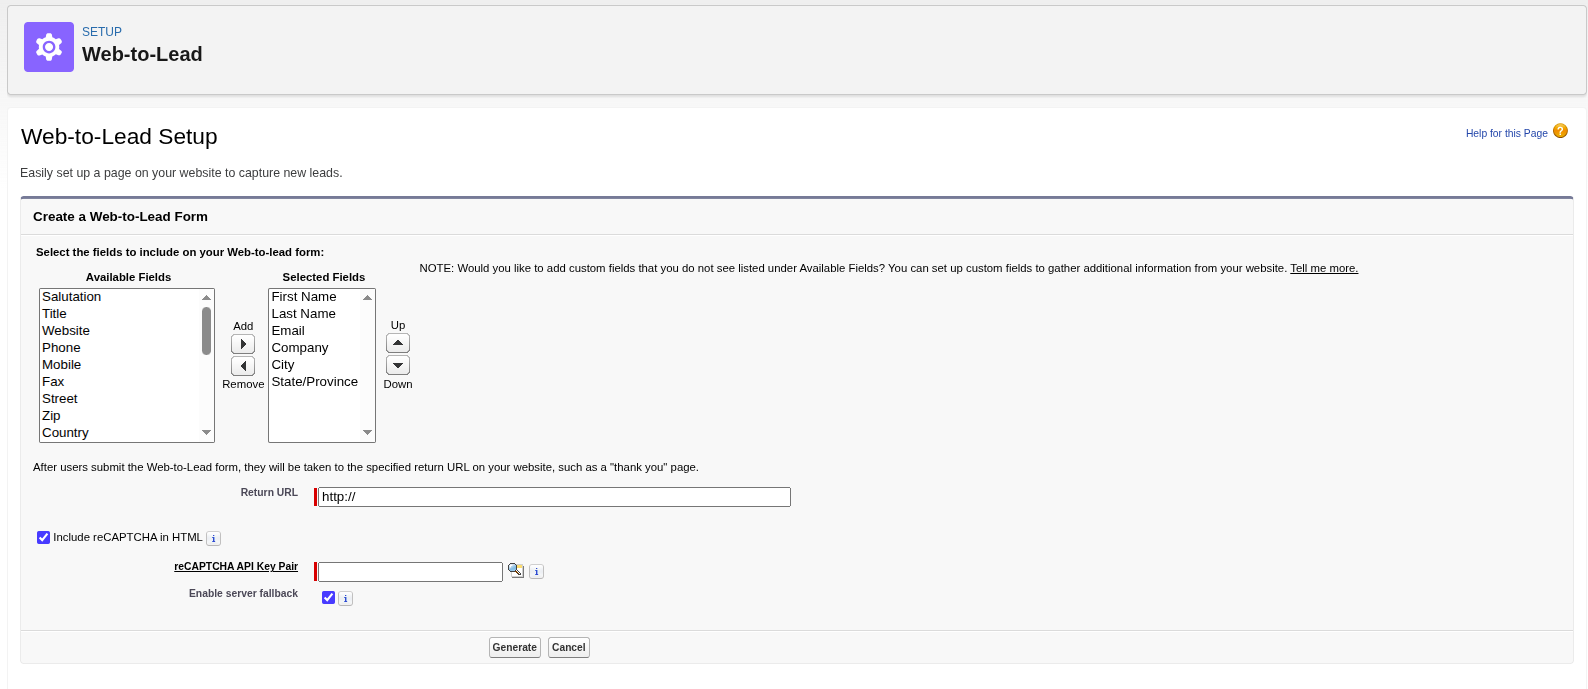
On the Web-to-Lead page, click Create Web-to-Lead Form.
You will land on this page.
Configure the form:
Select the fields you need for your form.
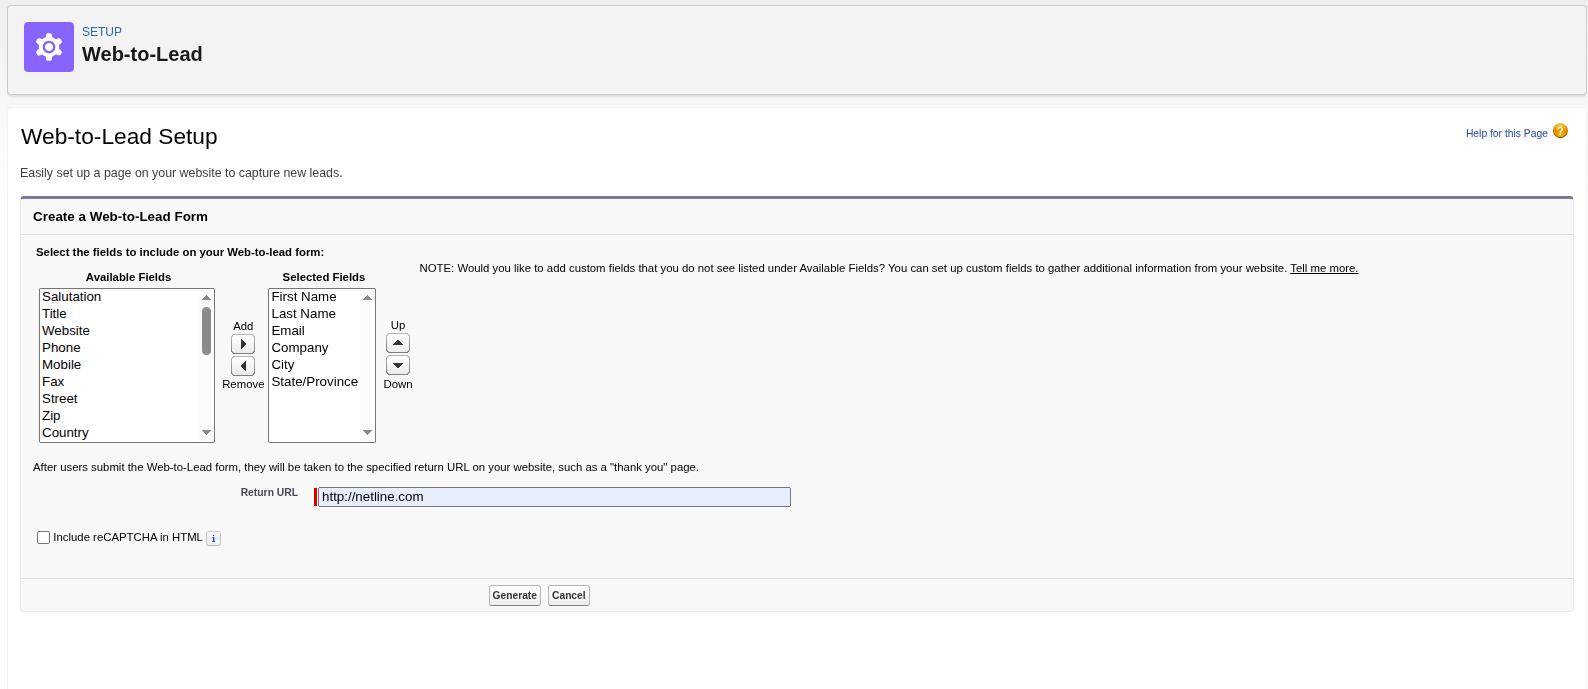
Set the Return URL to https://netline.com.
UncheckInclude reCAPTCHA in HTML.
After this your page should look something like this.
Click Generate to create the form.
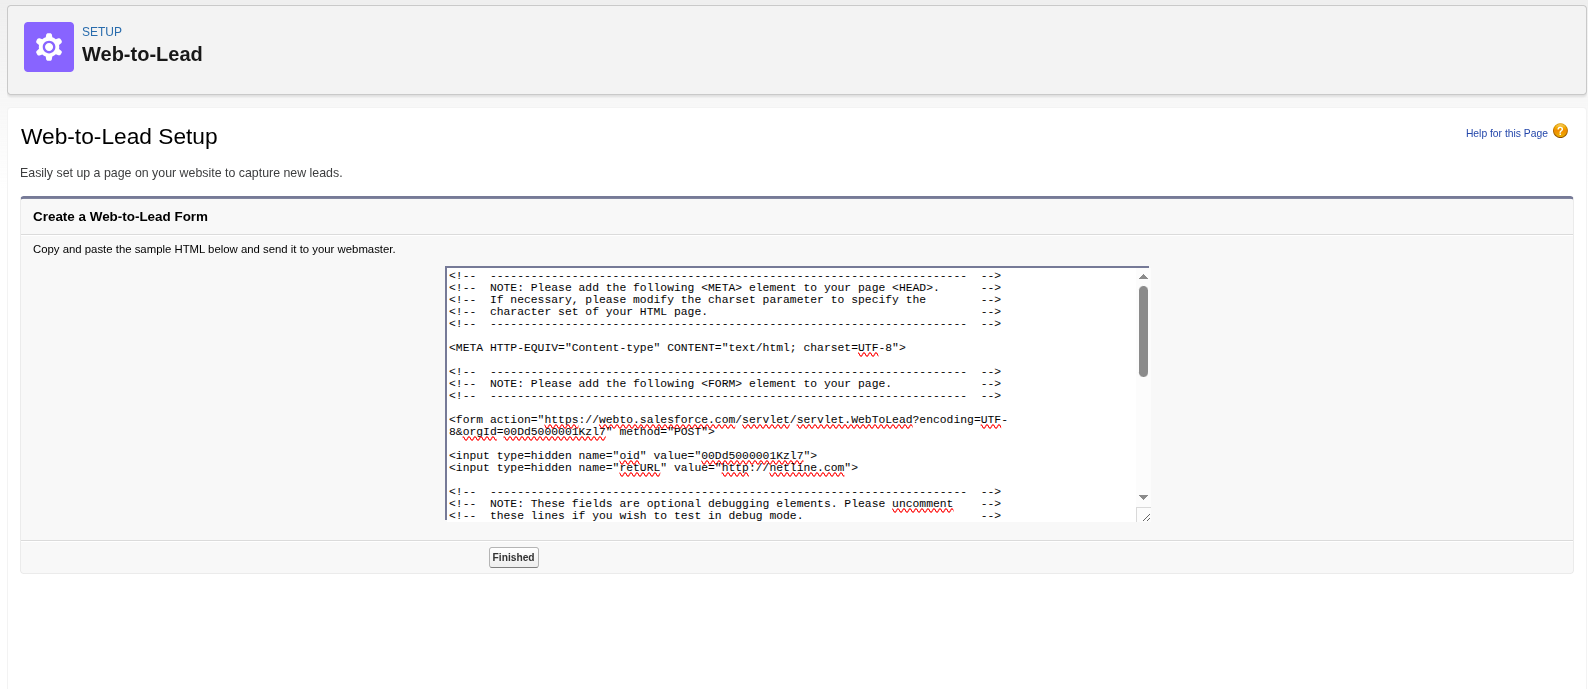
A page will appear with a textbox containing your form’s HTML. Copy all of the text and save it — you’ll need the values from this form in the next step.
This is a sample of the content copied from the textbox. We’ll use values from this form in the next step when setting up NetLine.
<!--  ----------------------------------------------------------------------  -->
<!--  NOTE: Please add the following <META> element to your page <HEAD>.      -->
<!--  If necessary, please modify the charset parameter to specify the        -->
<!--  character set of your HTML page.                                        -->
<!--  ----------------------------------------------------------------------  -->
<META HTTP-EQUIV="Content-type" CONTENT="text/html; charset=UTF-8">
<!--  ----------------------------------------------------------------------  -->
<!--  NOTE: Please add the following <FORM> element to your page.             -->
<!--  ----------------------------------------------------------------------  -->
<form action="https://webto.salesforce.com/servlet/servlet.WebToLead?encoding=UTF-8&orgId=00Dd5000001Kzl7" method="POST">
<input type=hidden name="oid" value="00Dd5000001Kzl7">
<input type=hidden name="retURL" value="http://netline.com">
<!--  ----------------------------------------------------------------------  -->
<!--  NOTE: These fields are optional debugging elements. Please uncomment    -->
<!--  these lines if you wish to test in debug mode.                          -->
<!--  <input type="hidden" name="debug" value=1>                              -->
<!--  <input type="hidden" name="debugEmail" value="msaqibkinza@gmail.com">   -->
<!--  ----------------------------------------------------------------------  -->
<label for="first_name">First Name</label><input  id="first_name" maxlength="40" name="first_name" size="20" type="text" /><br>
<label for="last_name">Last Name</label><input  id="last_name" maxlength="80" name="last_name" size="20" type="text" /><br>
<label for="email">Email</label><input  id="email" maxlength="80" name="email" size="20" type="text" /><br>
<label for="company">Company</label><input  id="company" maxlength="40" name="company" size="20" type="text" /><br>

<label for="city">City</label><input  id="city" maxlength="40" name="city" size="20" type="text" /><br>
<label for="state">State/Province</label><input  id="state" maxlength="20" name="state" size="20" type="text" /><br>
<input type="submit" name="submit">
</form>
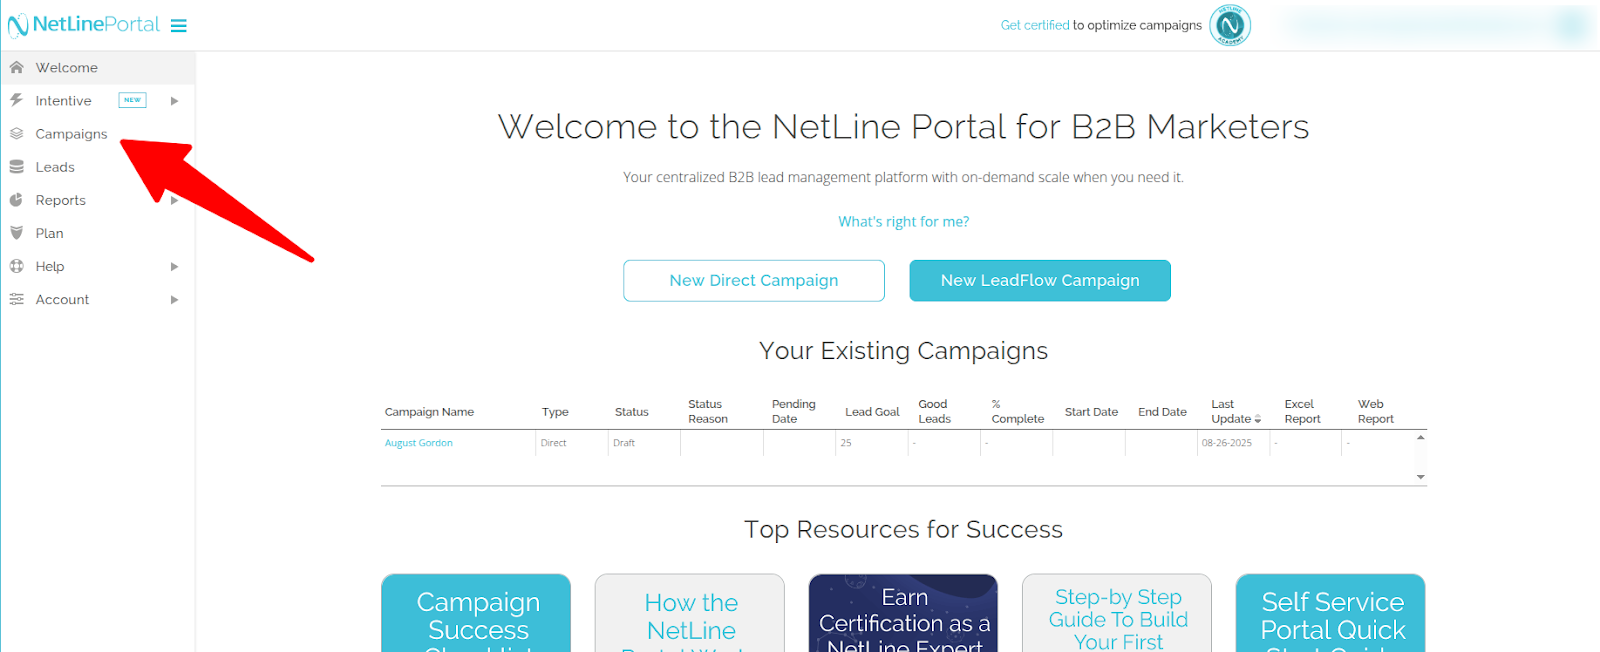
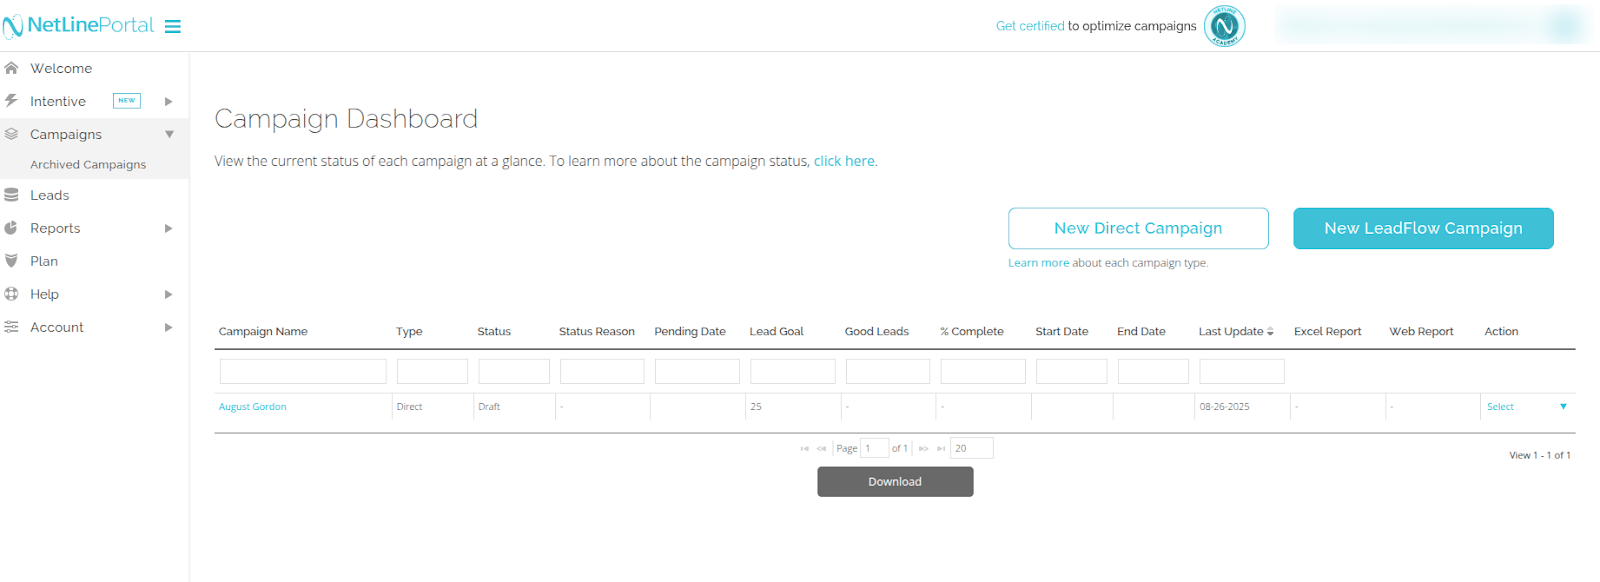
Once logged in, you’ll land on your NetLine Dashboard.
From the left-hand sidebar, click on Campaign
From the list of campaigns, choose the one you’d like to connect with Salesforce.
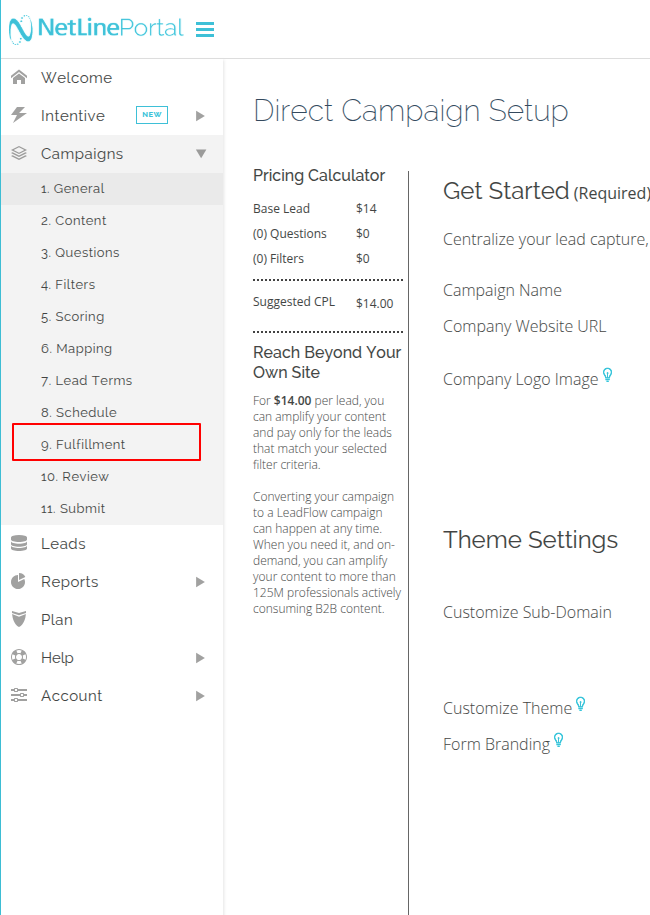
After setting up the campaign, click on Fulfillment in the left-hand menu (under Campaigns).
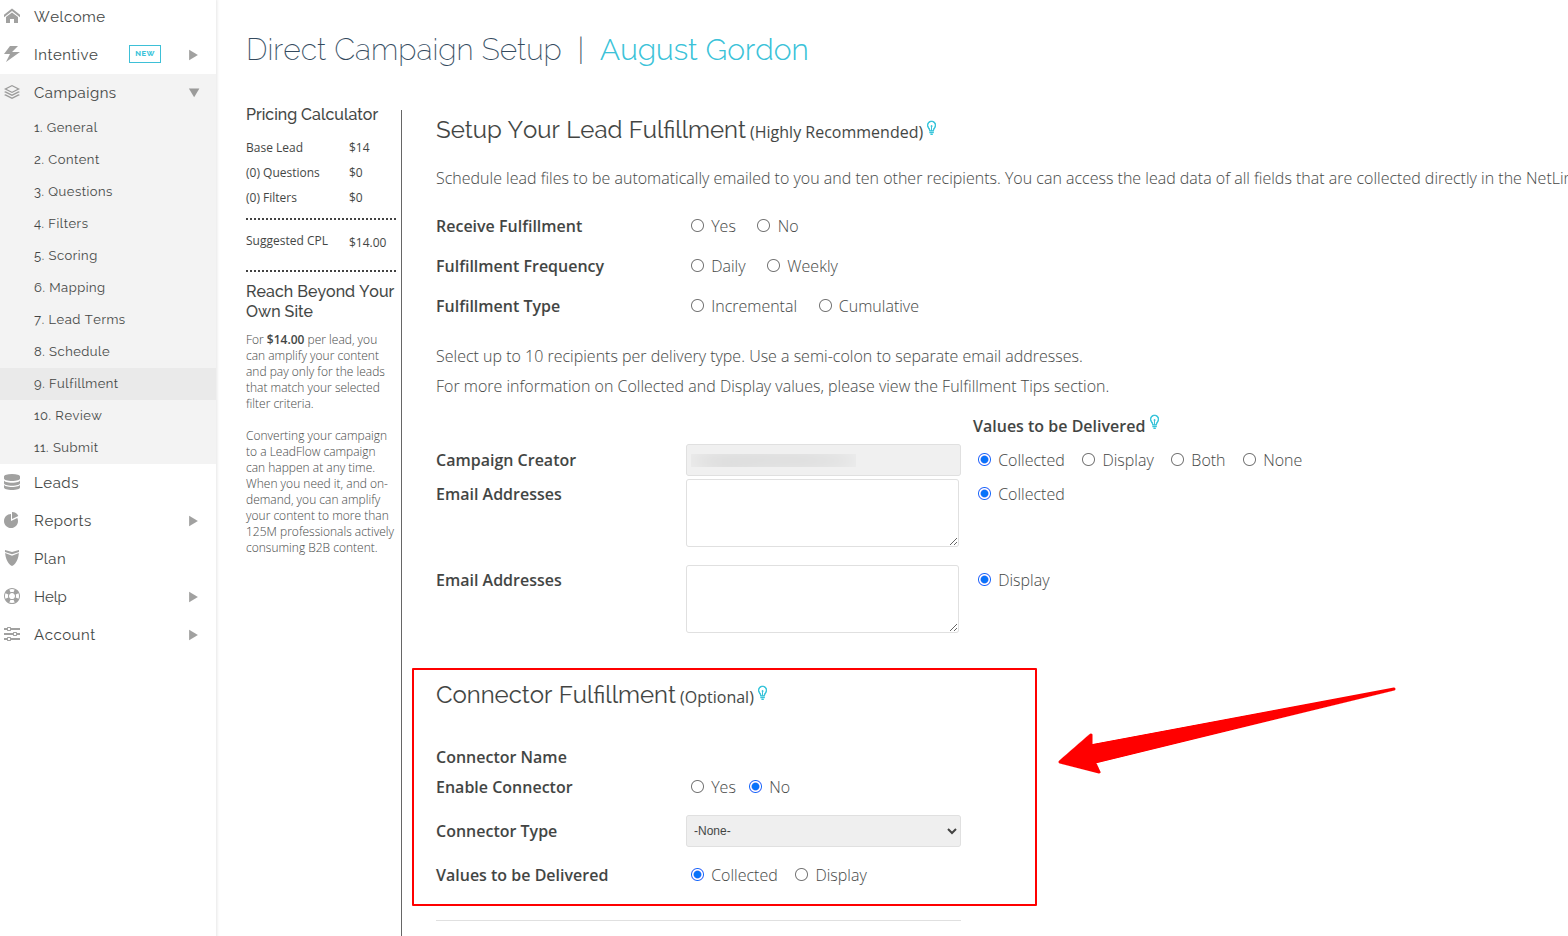
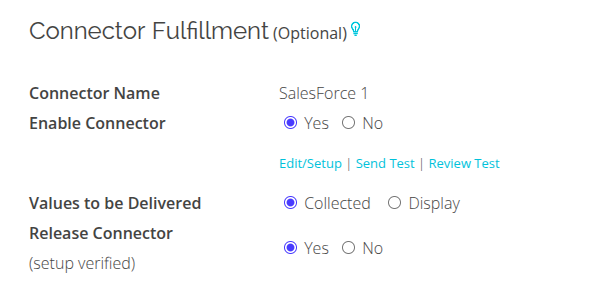
Go to the Connector Fulfillment section.
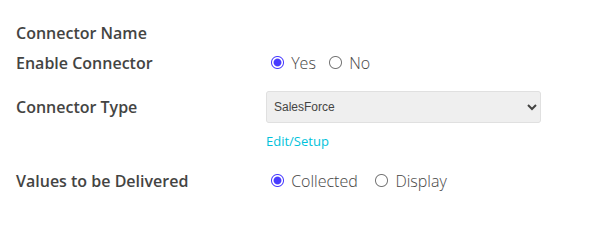
Toggle Enable Connector to Yes.
In the Connector Type dropdown, select Salesforce.
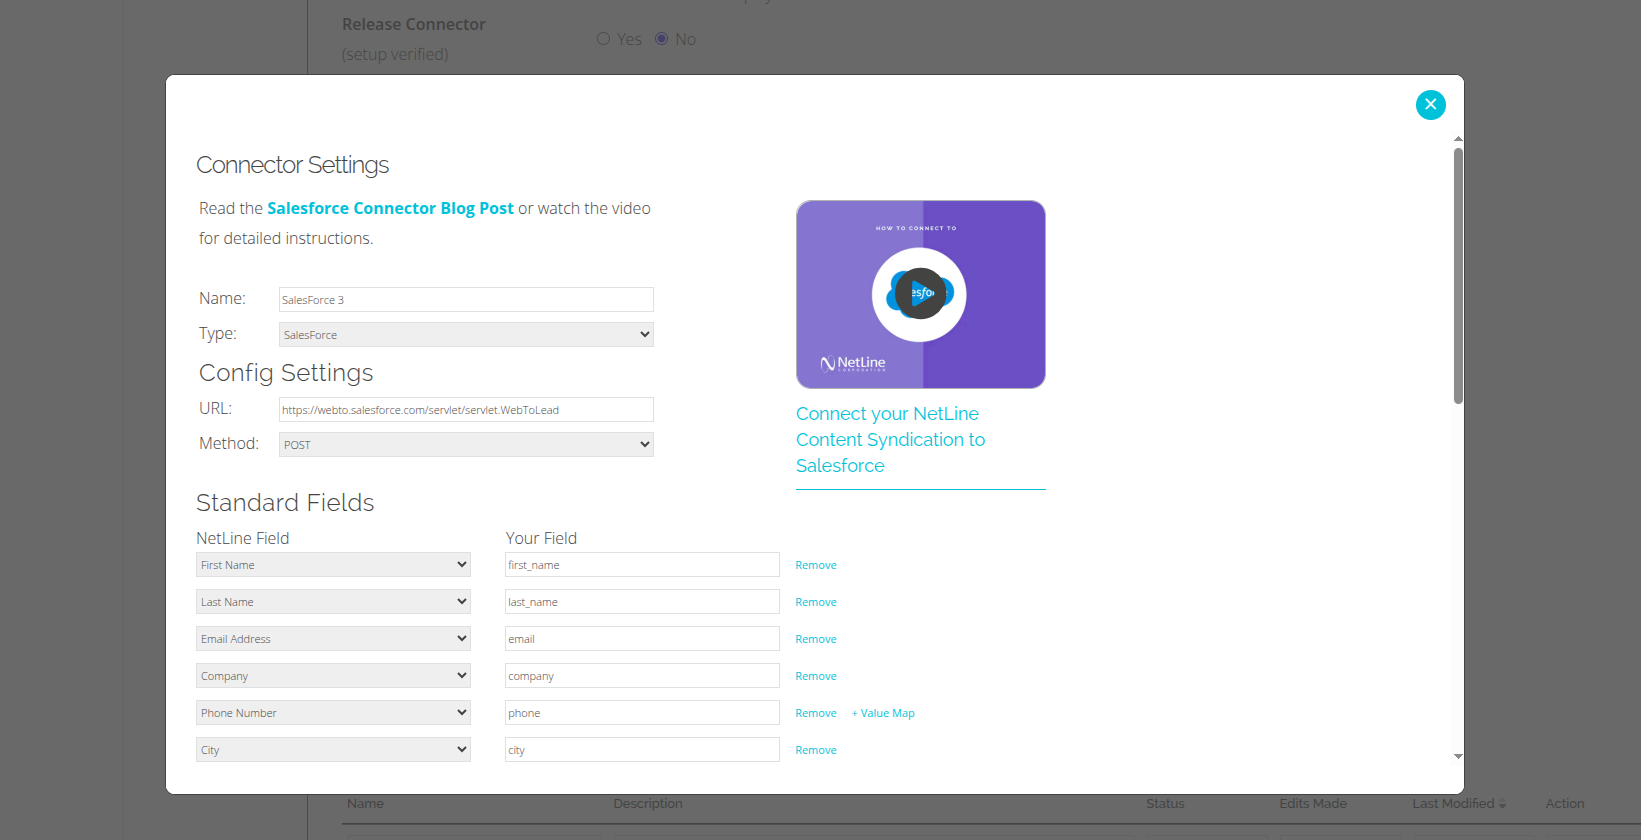
Click Edit/Setup — this will open a popup window with configuration settings.
Step 3: Map Salesforce Form Fields to NetLine
Now we need to map each Salesforce field to the matching field in NetLine. This makes sure the data flows into the right place.Open the form content you copied from Salesforce. For each field, look for the word after name=. That is the field’s Salesforce field name
The field name is first_name.
In NetLine, when setting up your connector, match the Salesforce field name to the corresponding NetLine field.
Example: Match first_name in Salesforce to First Name in NetLine.
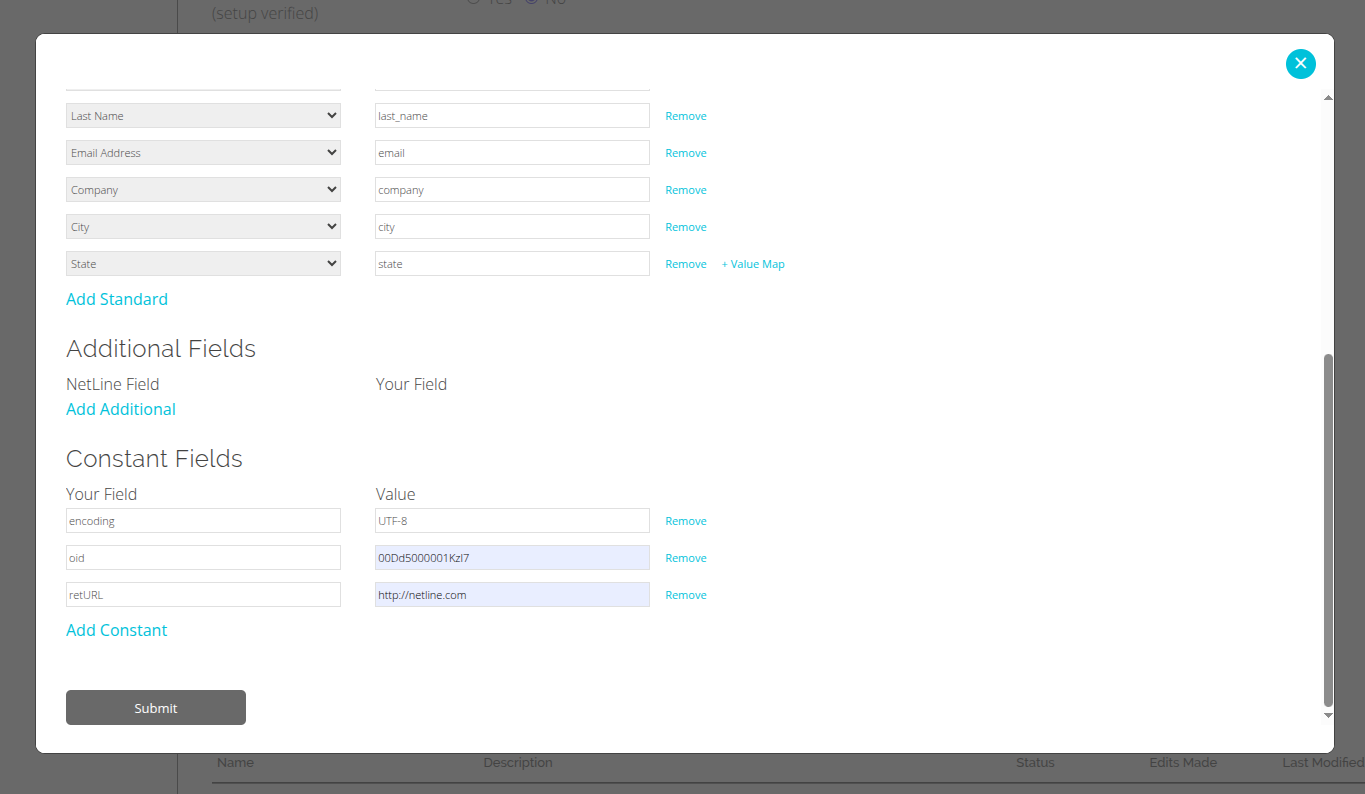
Repeat this for every field (last_name, email, company, city, state, etc.) and make sure to remove extra fields.Once all fields are matched, NetLine will know exactly where to send each piece of information in Salesforce.
After mapping all the fields, our standard fields will look something like this.
In addition to the fields you mapped, Salesforce also requires two special values: oid and retURL. These don’t change and must be entered exactly.
Copy the number shown inside value=”…”. (In this example it’s 00Dd5000001Kzl7.)
Paste that number into the oid field in NetLine.
Once you’ve filled in the constant fields, it should look like this.
Click Submit.
Now the Salesforce connector has been successfully added.
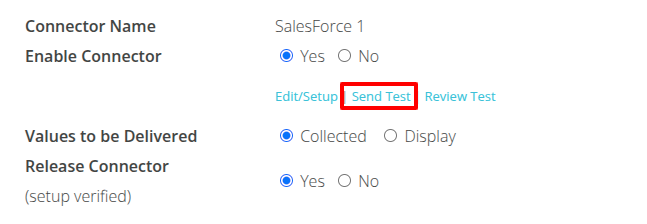
Step 4: Test The Connection
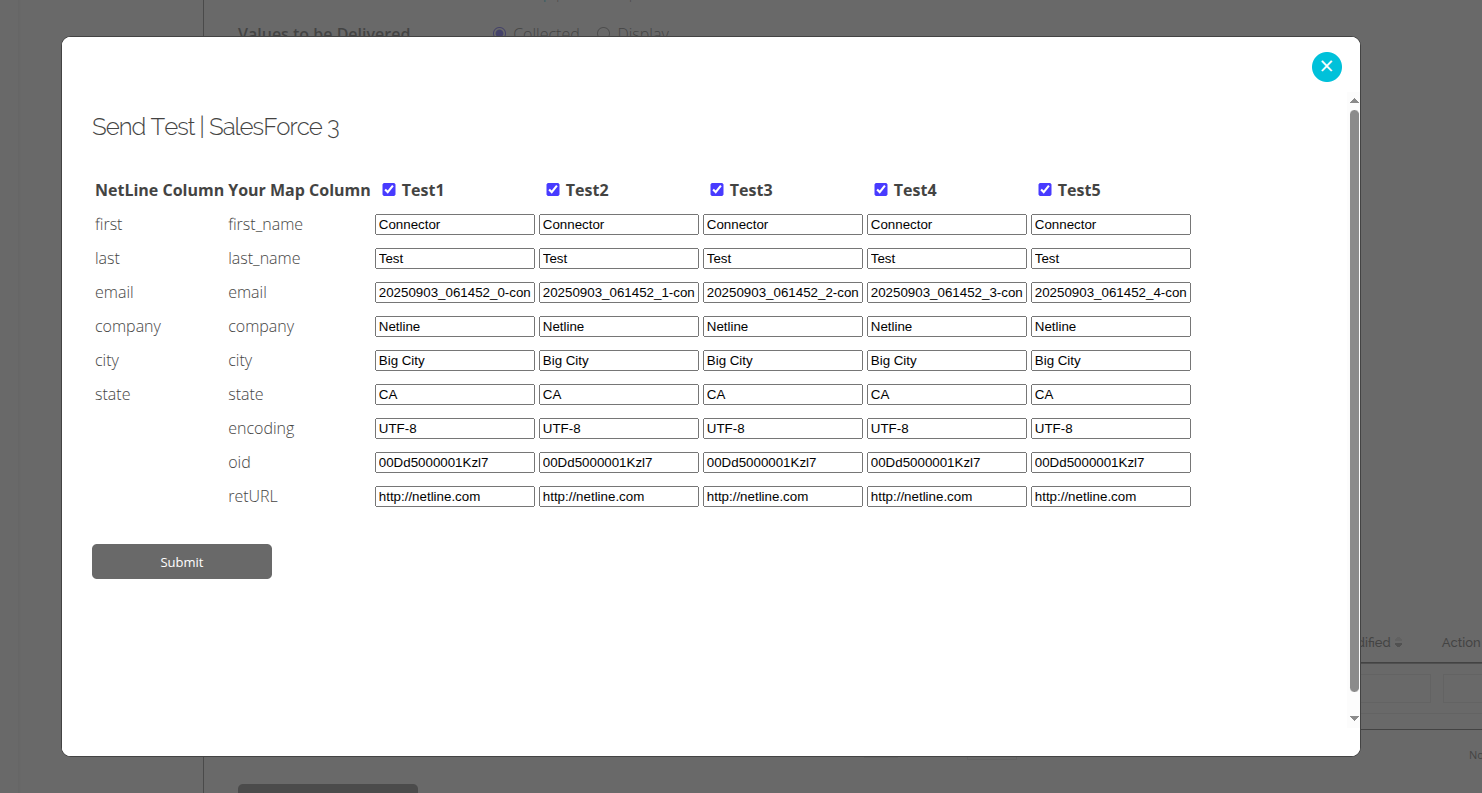
To test the connection, click on Send Test.
A confirmation window will appear with all the fields you have mapped. Note: The default sends 5 test leads, but you can deselect the checkboxes at the top if you want to send less.
Click on Submit.
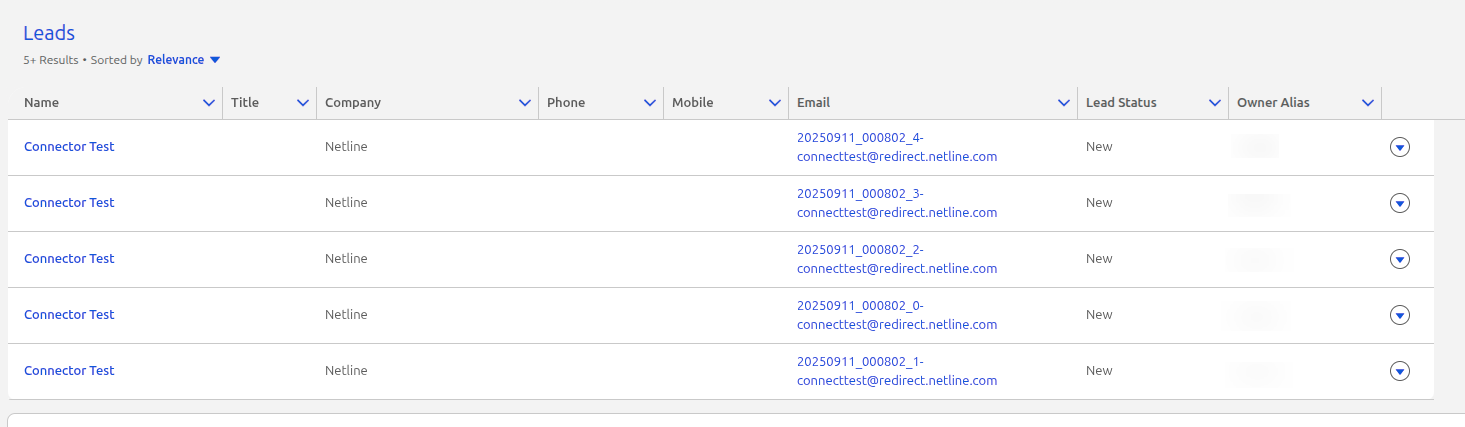
After submitting, you should see the test leads appear in your Salesforce Dashboard.
If the test leads don’t appear within a few minutes, check your field mapping formatting to ensure the characters match exactly. Missing underscores, uppercase, and lowercase characters can throw off the connection.
Also, if you’ve added custom fields in your NetLine form, make sure they have a place to go in Salesforce by creating a Custom Property.
Still Need Support?
If you get stuck, send a note to portal-support@netline.com — we’ll help get you on your way in no time.


 If the test leads don’t appear within a few minutes, check your field mapping formatting to ensure the characters match exactly. Missing underscores, uppercase, and lowercase characters can throw off the connection.
Also, if you’ve added custom fields in your NetLine form, make sure they have a place to go in Salesforce by creating a Custom Property.
If the test leads don’t appear within a few minutes, check your field mapping formatting to ensure the characters match exactly. Missing underscores, uppercase, and lowercase characters can throw off the connection.
Also, if you’ve added custom fields in your NetLine form, make sure they have a place to go in Salesforce by creating a Custom Property.