So, you want to build a connector from NetLine to feed your captured leads into a Zoom-hosted webinar?
You’ve come to the right place.
With the world using more video collaboration and webinar software than ever before, Zoom has become the choice du jour for businesses of all shapes and sizes.
Marketers want to use Zoom for all its worth in order to expand their virtual marketing efforts. As the usage of webinars has exploded (our partner ON24 reported a 333% increase in their own platform engagement in April 2020), so has the demand for more advanced features.
Users of the NetLine Portal are used to being able to funnel their leads from their NetLine accounts directly into the CRMs of choice. Now you can take those same leads and send them directly into your next Zoom webinar — an excellent way to boost attendance and simplify your registration process.
Connecting the NetLine Portal to Zoom via Zapier
Sounds really complicated, right? Not to worry, we’ve got it all figured out and will happily walk you through the process.
(If you’d rather watch the video to learn how to connect the portal to Zoom, you can do below:)
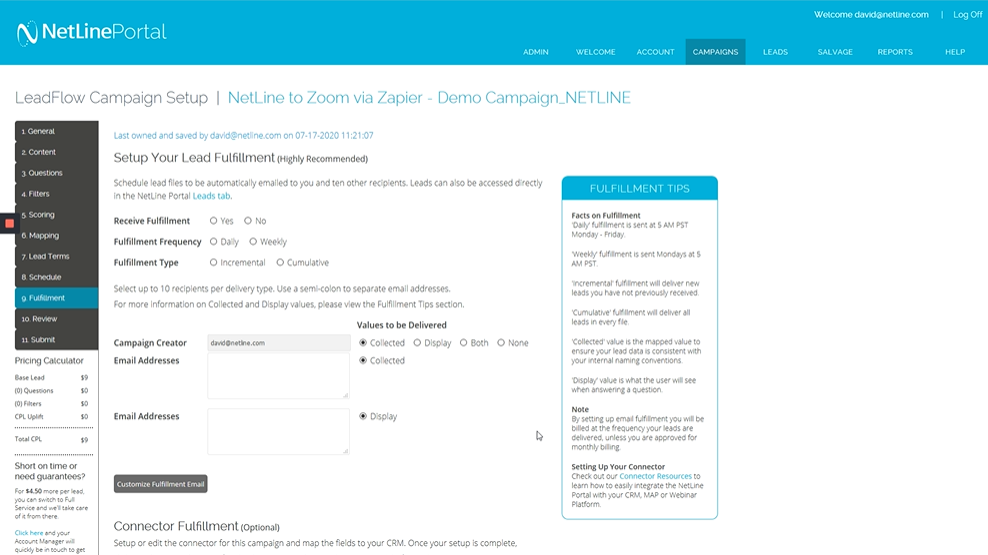
Starting at the Fulfillment step within the NetLine Portal, scroll down to the Connector Fulfillment section and select ‘Other’ from the Connector Type dropdown menu.
2. Verify That Your Zoom Webinar Has Been Setup Properly
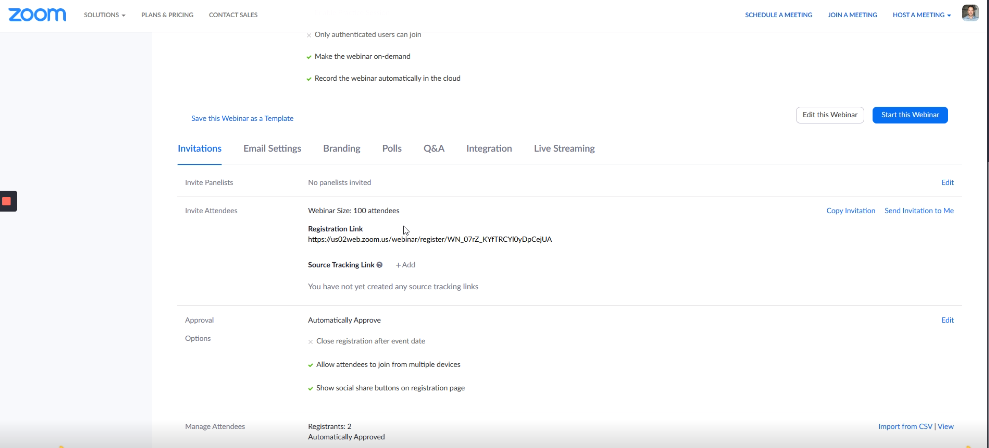
Double-check that everything is as you’d like it to be within your Zoom platform.
3. Use a Zapier Webhook to Connect to the NetLine Portal
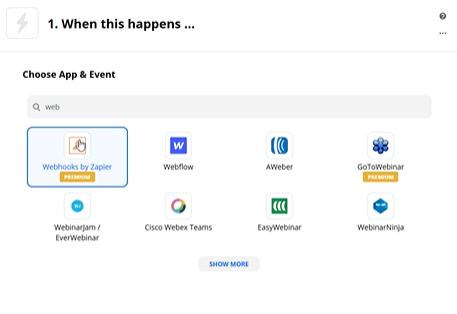
A webhook is a tool that allows you to securely send data (usually via post) which is then caught by a “hook” which then allows you to pass this data to another 3rd-party system.
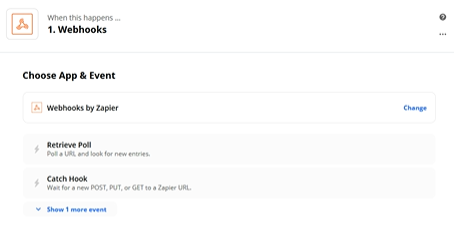
In this case, we’ll be selecting Catch Hook and then clicking Continue.
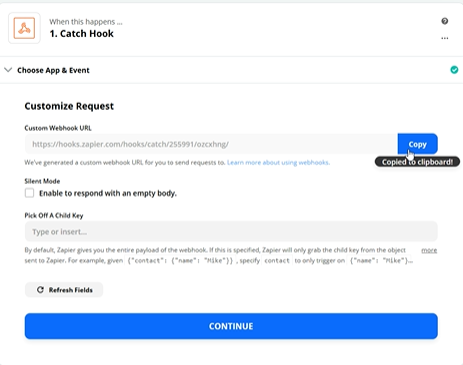
From there, copy the Custom Webhook URL and head back to the NetLine Portal.
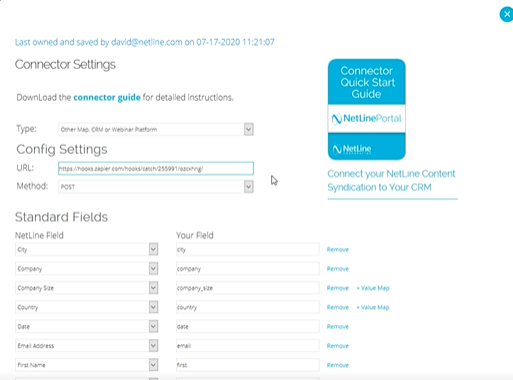
Under the Configure Settings section, paste your link in the appropriate URL field.
4. Test Your Trigger
Remaining in the NetLine Portal, we’ll now configure the fields you want to receive within the Standard Fields section.
Once you’ve entered or removed the fields you’d like populated/eliminated, hit Submit.
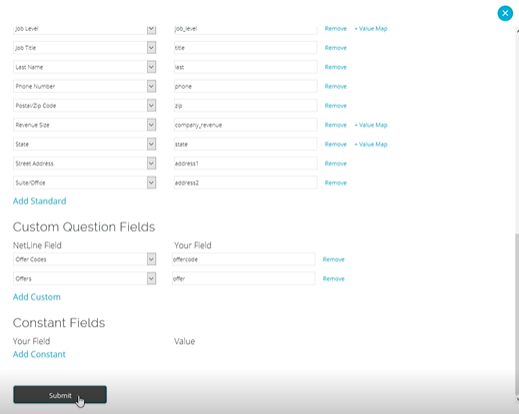
Next, we’ll click Send Test under the Connector Type which will launch a new window with a bunch of test leads. If everything looks correct, hit Submit. This will trigger a group of test leads (however many you’ve chosen) to send over to Zapier.
Once you’ve done this, return to Zapier and click Test Trigger. So long as everything is as it should be, Zapier will find this data and present it like so:
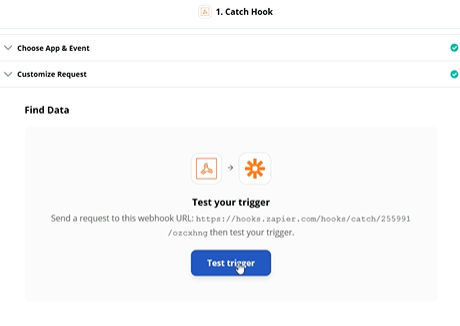
Select one of the leads and click Continue.
5. Send Your Data to Zoom
Under Choose App & Event in Zapier, select Zoom.
Next, you’ll want to Create a New Webinar Registrant; Zapier will now begin looking for Zoom accounts. Select your preferred Zoom account and subsequent webinar that you’d like to funnel data into.
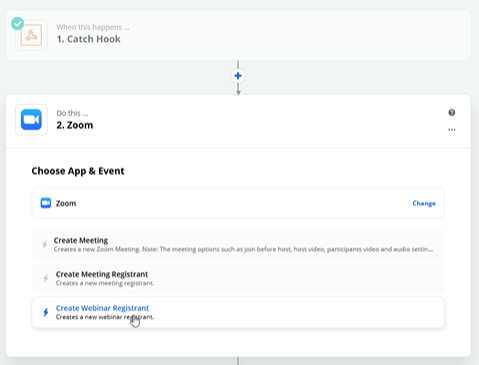
Using the same fields (I.e. First name, Last name, Phone, Email, Industry, etc.) you’ve already sent over from the NetLine Portal, map the same fields into Zapier.
6. Test The Data Being Sent to Zoom
After entering all of your fields, Zapier will prompt you to test the data that’s being sent to the webinar. Simply click Test & Review and, so long as everything is connected properly, you should get a Test was successful! message.
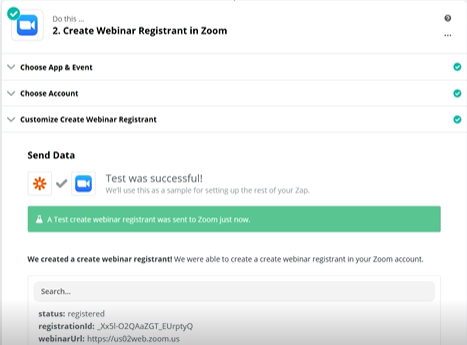
From here, we’ll go back to Zoom and under the Webinars button, select the webinar we’re sending data to and scroll down to the bottom of the page.
In the Manage Attendees segment, you should be able to see whether your number of registrants has changed from your original total before connecting the webhook. You can confirm these new registrants by clicking View to the right of the Manage Attendees section.
Successfully Connecting NetLine to Zoom in a Matter of Minutes
That’s it!
With this connection in place, you should be able to see leads flowing from your NetLine Portal account into your Zoom webinars via Zapier.
If you have any questions or you’re not seeing your NetLine leads in your Zoom account, Portal Support is always eager to help and provide solutions and guidance.

