Overview
Integrating NetLine with HubSpot allows leads captured through your NetLine campaigns to automatically flow into your HubSpot CRM, saving time and enabling instant follow-up. The setup is quick and requires no coding. In this guide, you’ll:- Create a form in HubSpot to serve as the entry point for your NetLine leads.
- Copy the form’s details (Portal ID & Form GUID) from HubSpot.
- Add the HubSpot form URL into NetLine as a connector.
- Map fields between NetLine and HubSpot so data matches correctly.
- Send a test lead to confirm the integration is working.
Step 1: Get HubSpot Form Details
- Open hubspot.com and log in with your account credentials.
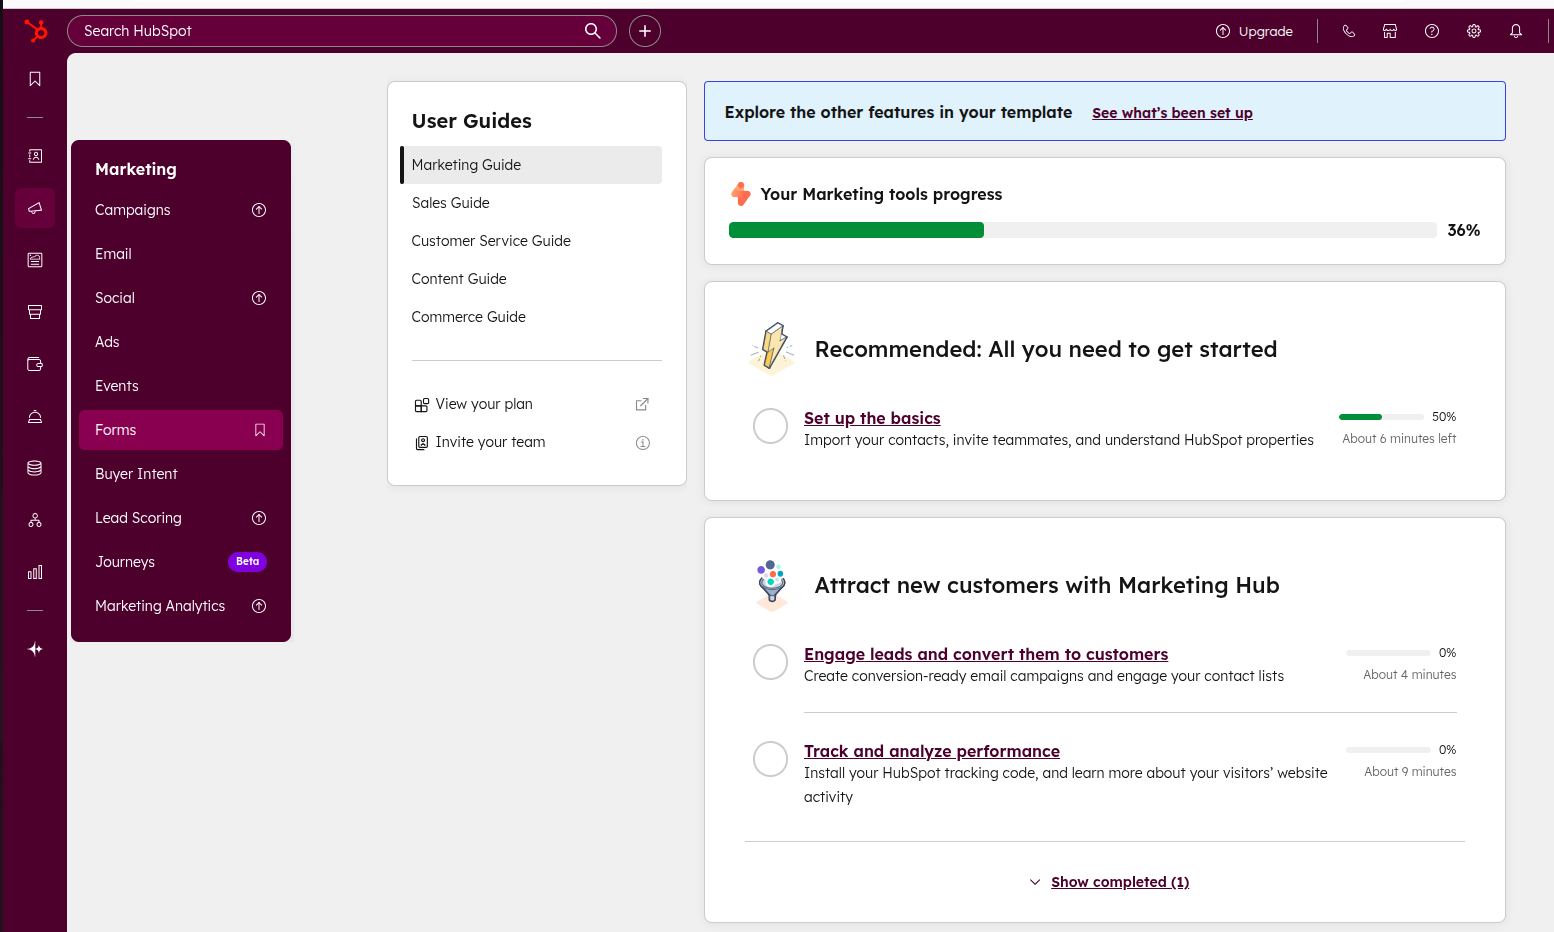
- Once logged in, you’ll land on your HubSpot Dashboard.
- From the left-hand sidebar menu, click on Marketing → Forms.
- Click on Create Form in the top-right corner or use the already existing one.
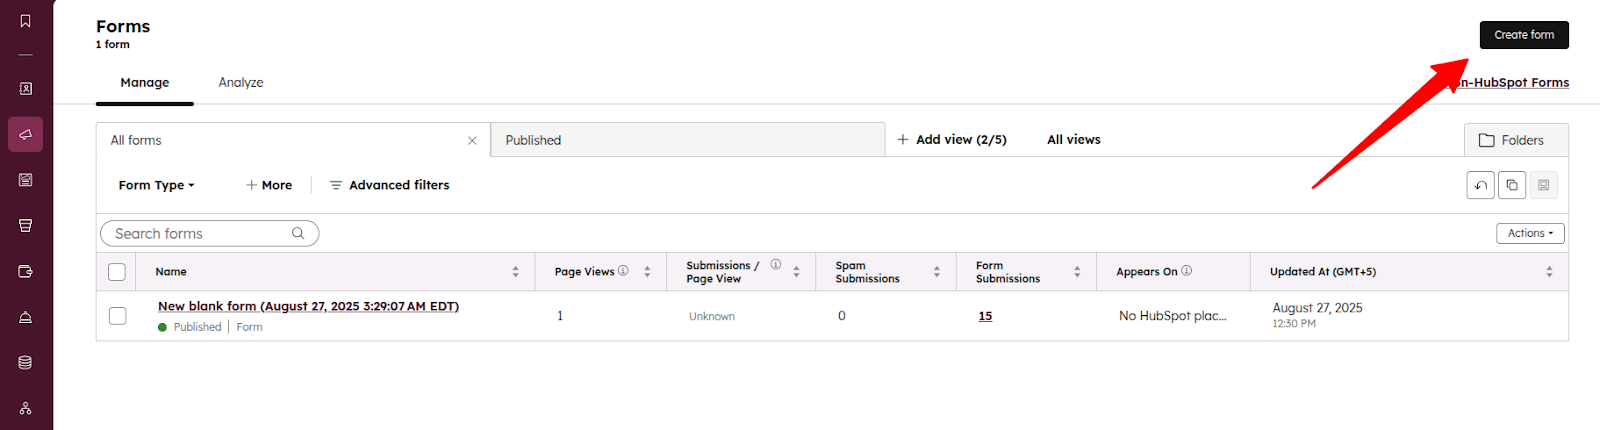
- Select a form template and you’ll be taken to the Form Creation page.

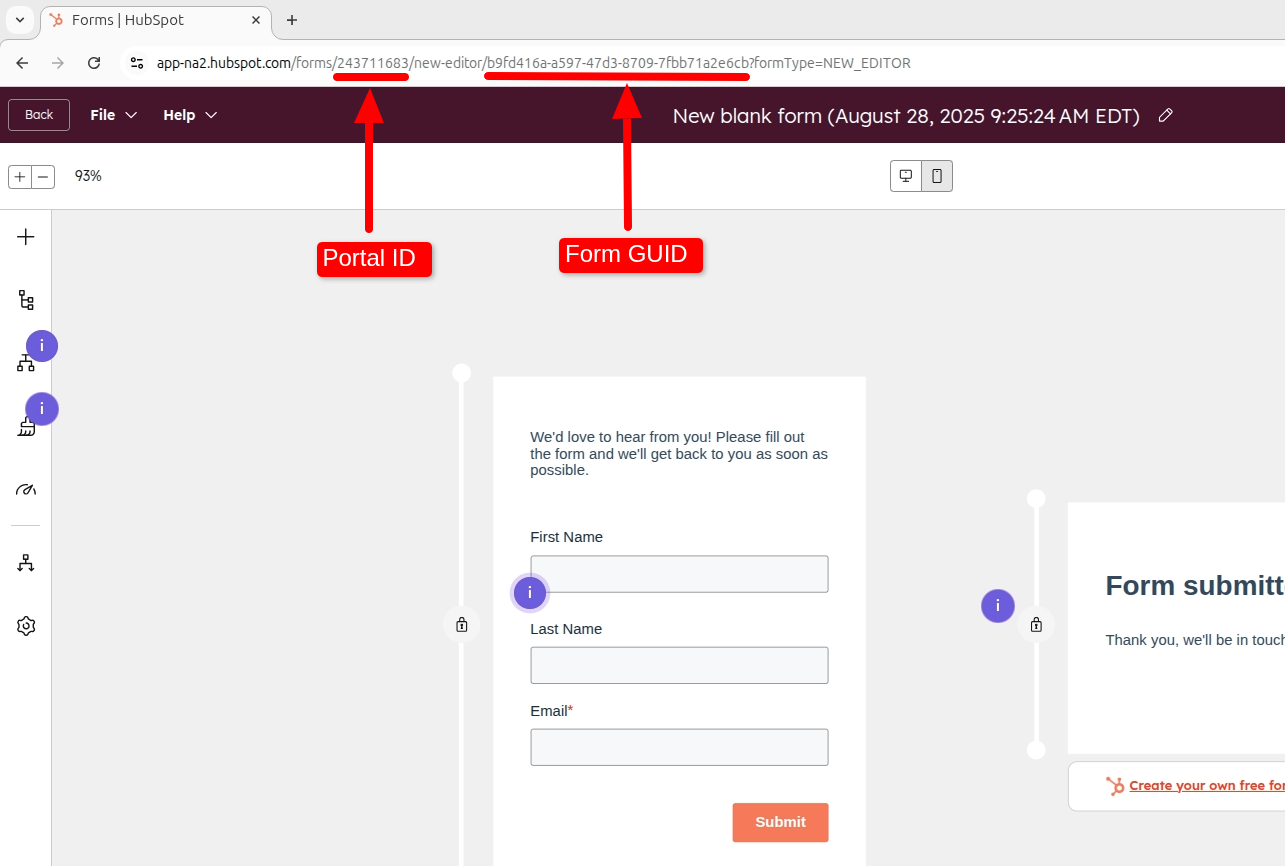
- NetLine connects to HubSpot by sending leads into a HubSpot form. To make this work, you’ll need two pieces of information from the form you just created.
- Portal ID – This is your HubSpot account ID.
- Form GUID – This is the unique ID of the specific form.
- On the form settings screen, locate the Portal ID and Form GUID:
- Example:
- Portal ID: 243711683
- Form GUID: cddbdd92-78f5-406a-943b-91f6e284f033
- Example:
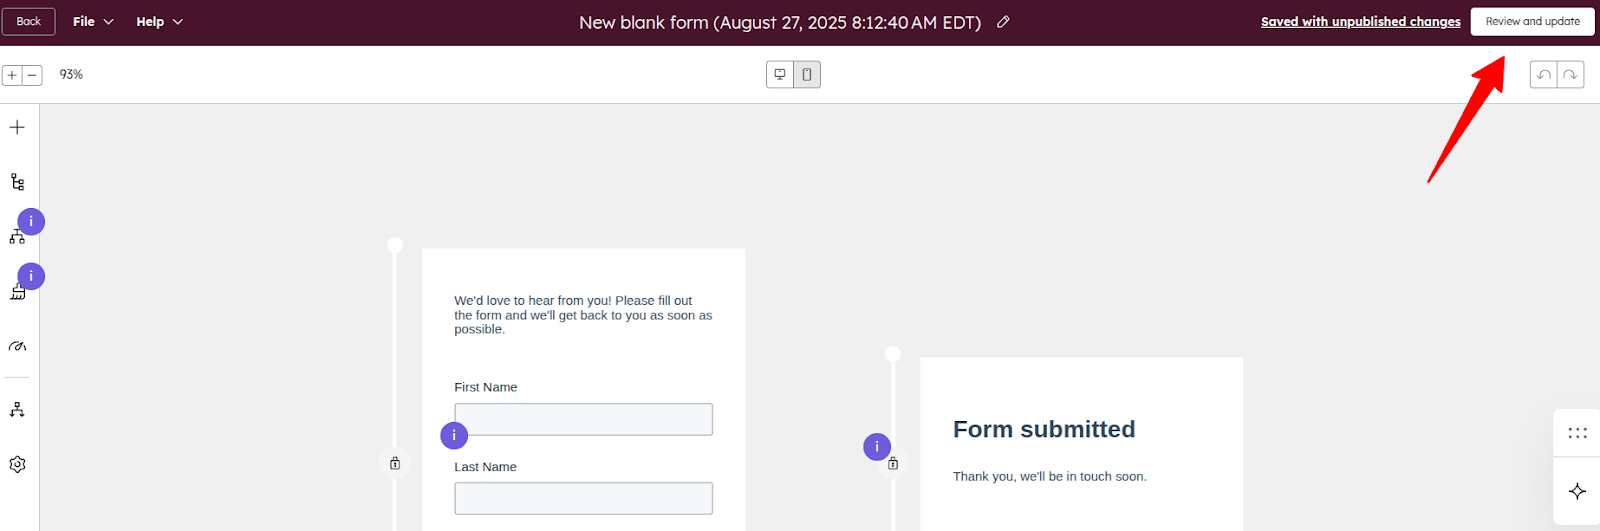
- Copy these values and save them safely. You’ll need them in the next step when setting up the connection in NetLine.
- Once done, click Review and Publish to make your form live.
Step 2: Login To NetLine Portal
- Open portal.netline.com and log in with your account credentials.
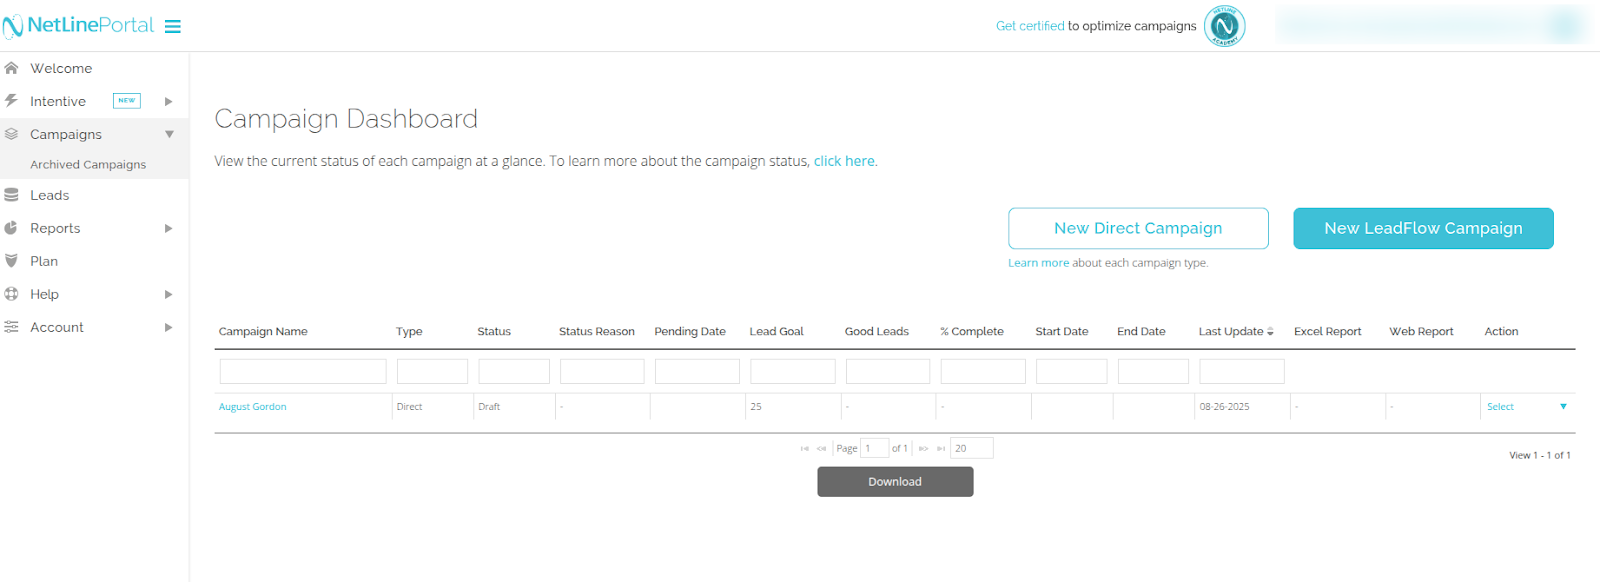
- Once logged in, you’ll land on your NetLine Dashboard.
- From the left-hand sidebar, click on Campaigns.
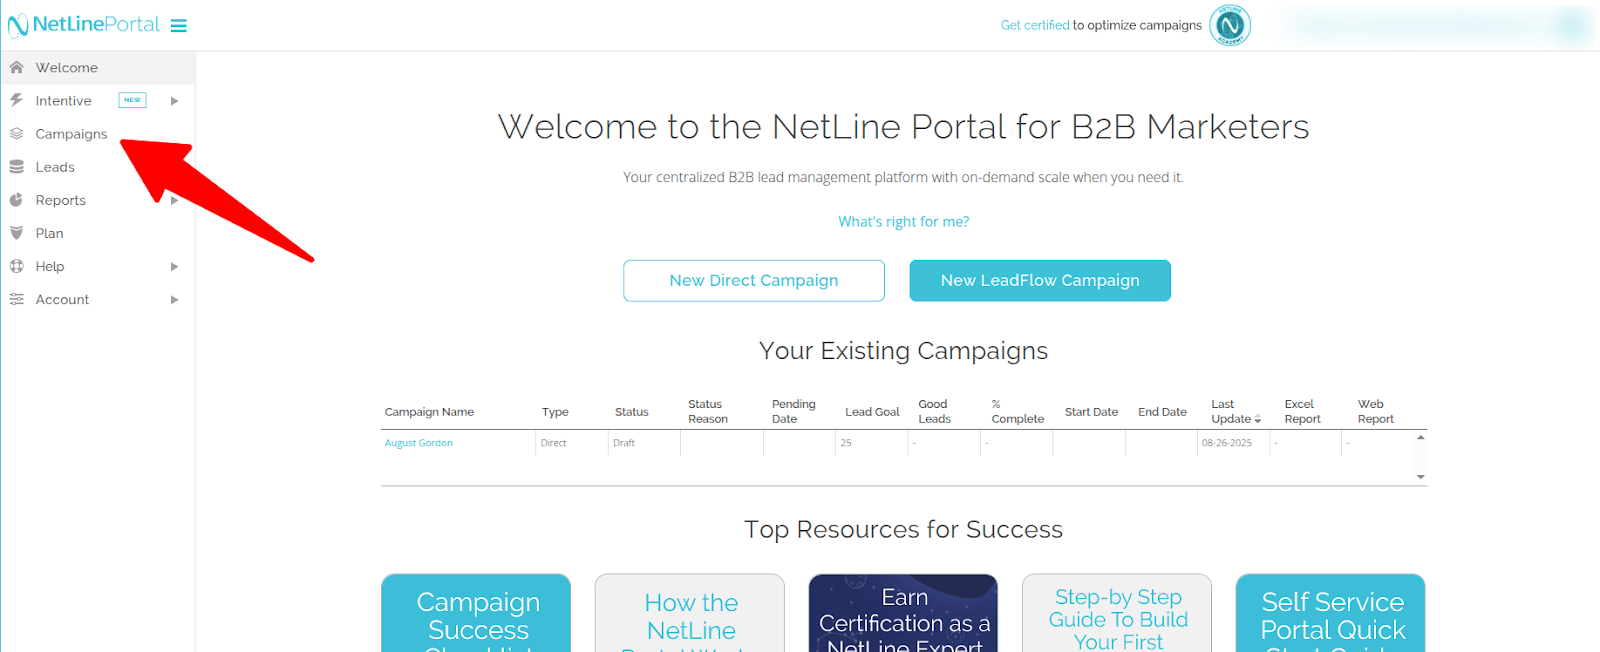
- From the list of campaigns, choose the one you’d like to connect with HubSpot.
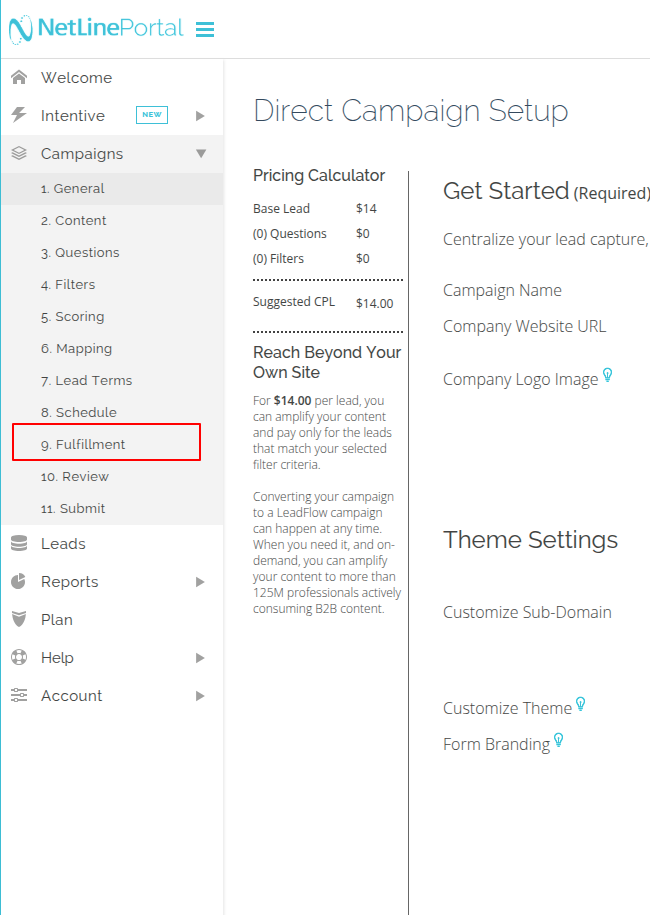
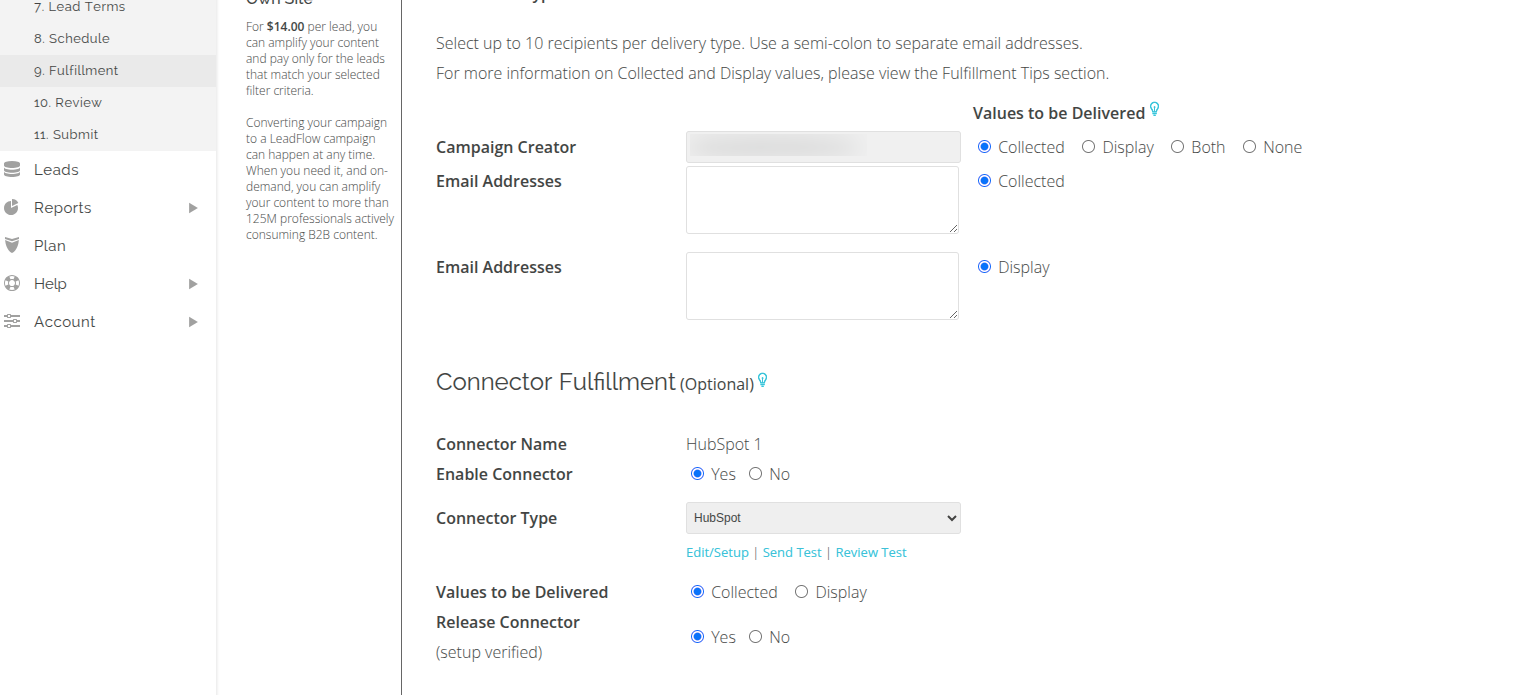
- After setting up the campaign, click on Fulfillment in the left-hand menu (under Campaigns).
- Go to the Connector Fulfillment section.
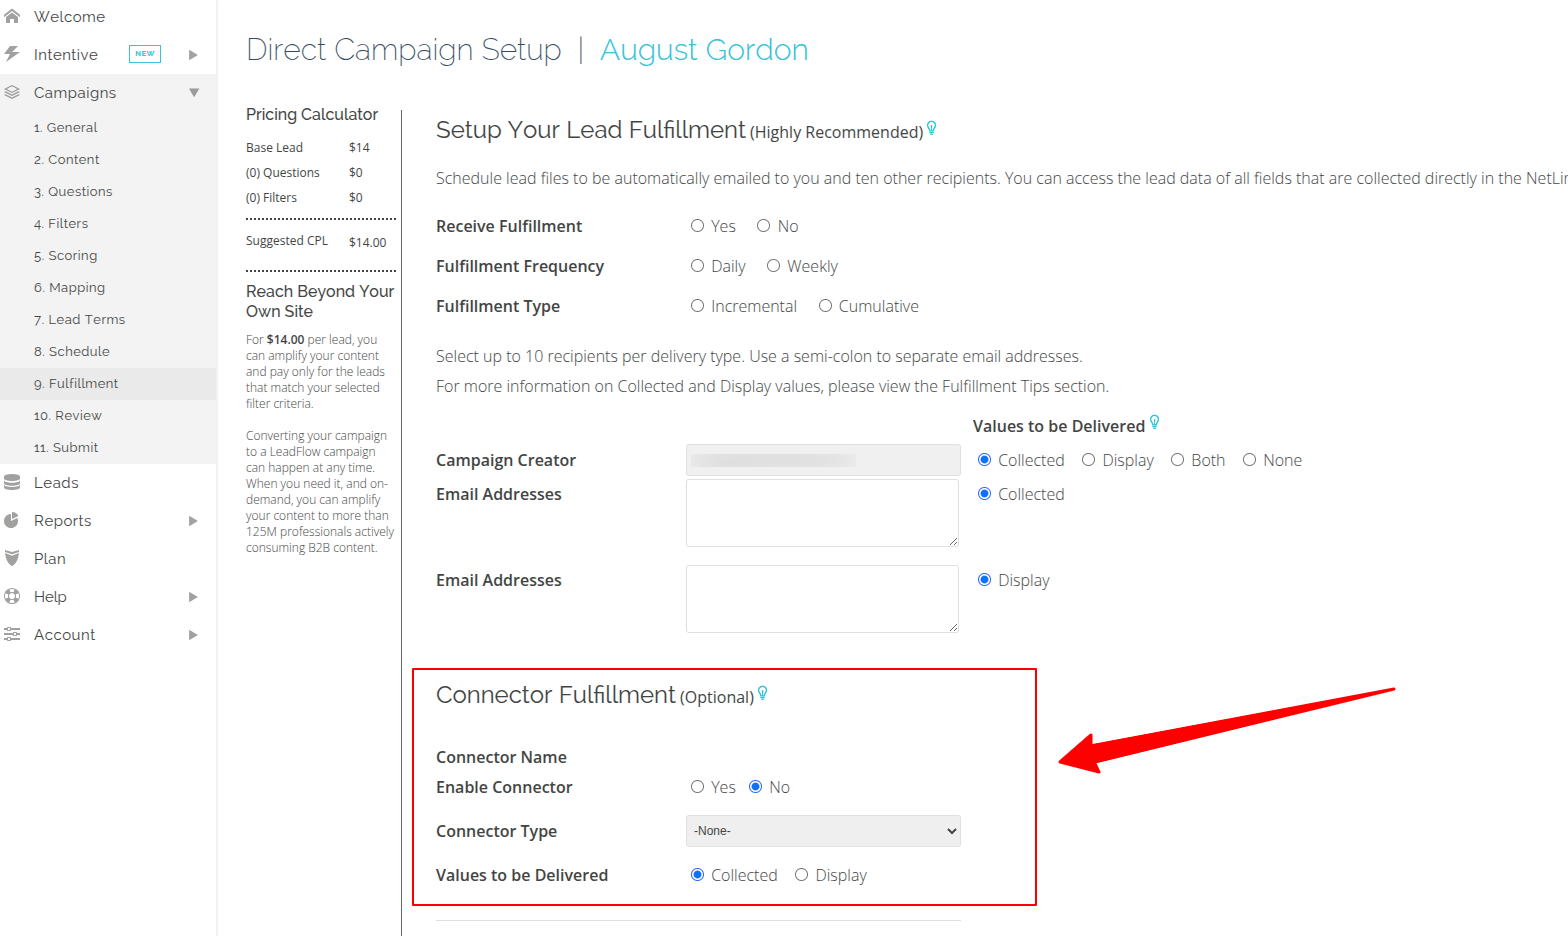
- Toggle Enable Connector to Yes.
- In the Connector Type dropdown, select HubSpot.

- Click Edit/Setup — this will open a popup window with configuration settings.
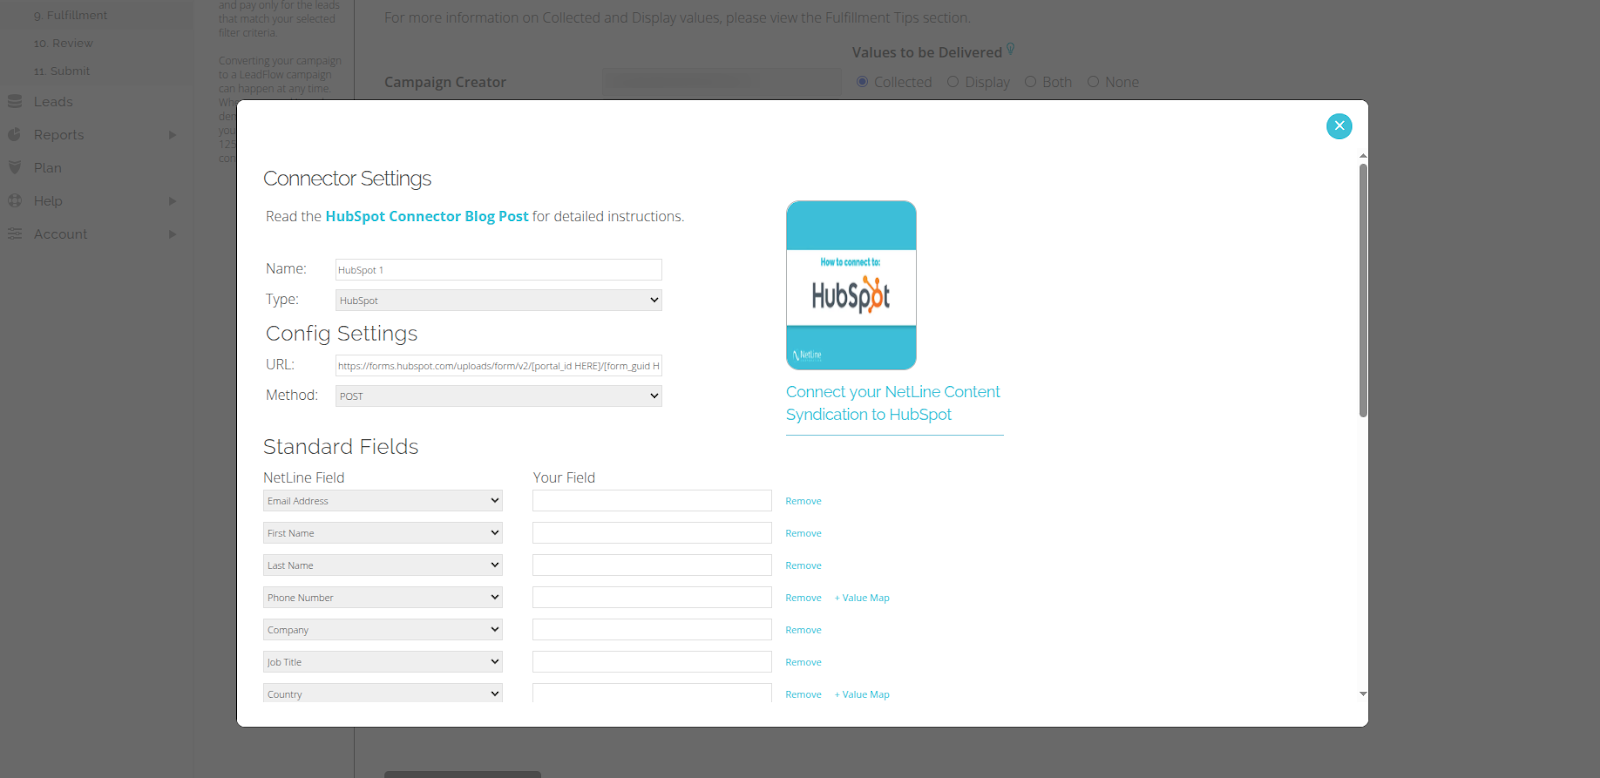
- In the Config Settings section, find the URL field.
- Here you can see the HubSpot form submission URL in the following format:
- https://forms.hubspot.com/uploads/form/v2/[portal_id HERE]/[form_guid HERE]
- Replace:
- [portal_id HERE] with your HubSpot Portal ID
- [form_guid HERE] with your HubSpot Form GUID
- The final URL will look something like this: https://forms.hubspot.com/uploads/form/v2/243711683/cddbdd92-78f5-406a-943b-91f6e284f033
- Now that we’ve entered the correct HubSpot form URL, the next step is to map the NetLine fields with the corresponding HubSpot contact properties. This ensures that whenever a lead is captured in NetLine, the data flows into the right fields in HubSpot (e.g., First Name, Last Name, Email, Company, etc.).
Step 3: Map Fields
- For mapping the fields from HubSpot to NetLine fields, follow the steps below:
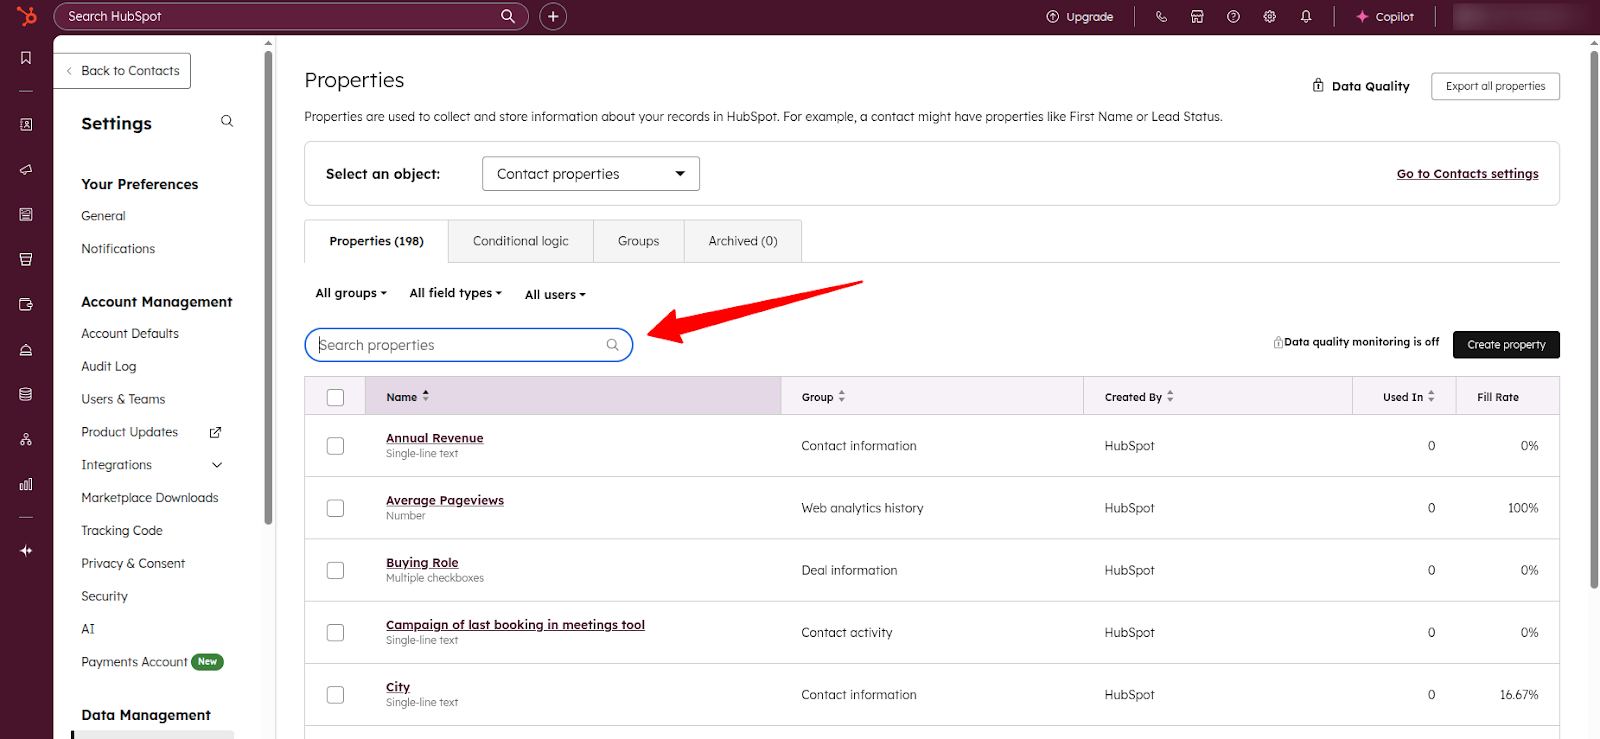
- From the left-hand sidebar menu, click on CRM → Contacts.

- In the top navigation bar, click on Actions and then select Edit Properties.

- You will land on this page.
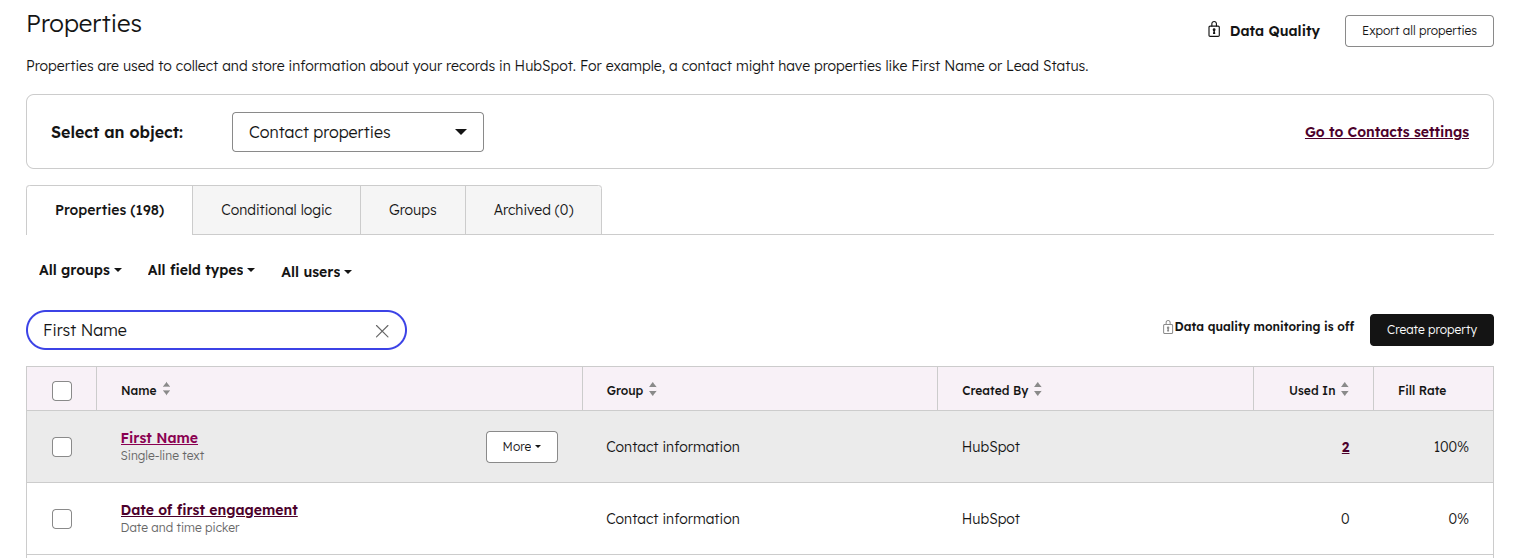
- Search for the property you want to map. For example, search for the field called First Name. From the results table, click on First Name.
- On the property details screen, copy the Internal Name. In this case, it is firstname.
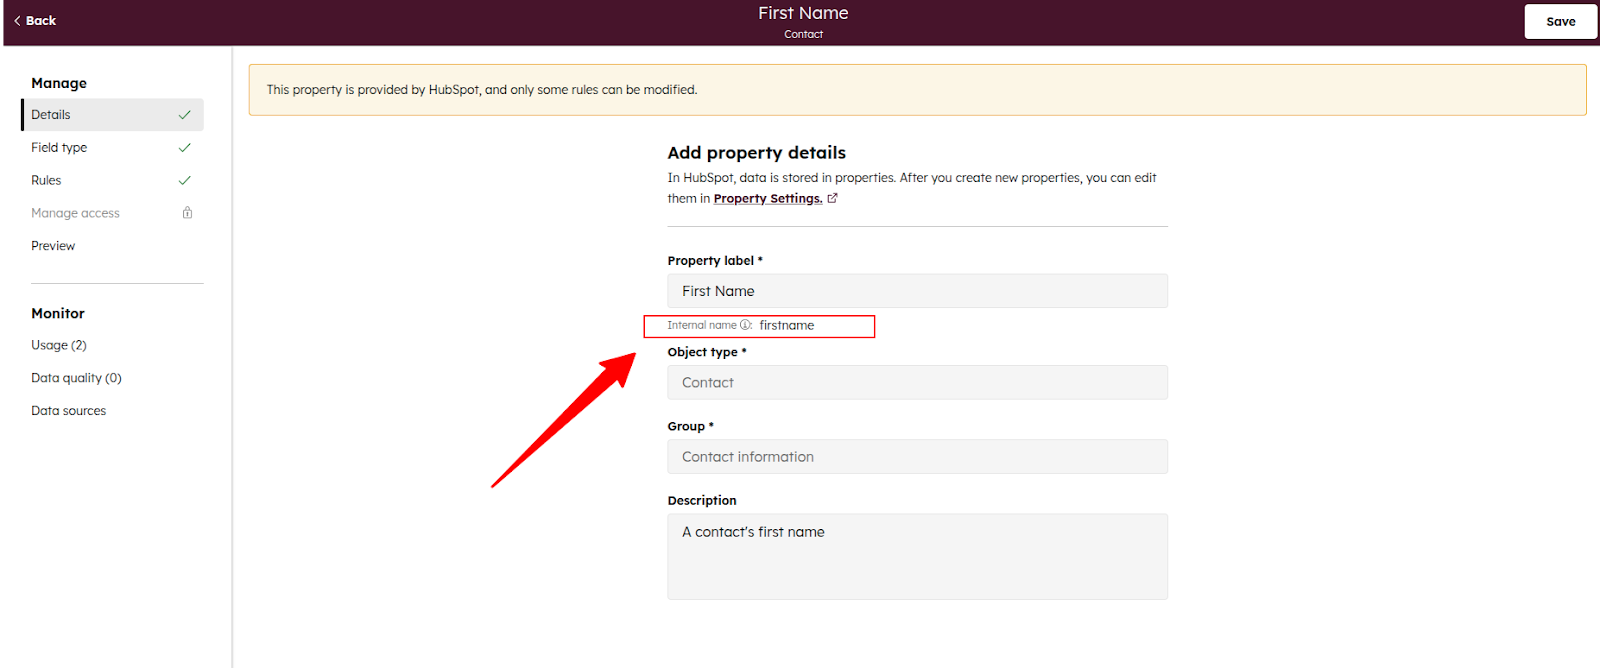
- Paste this Internal Name into the corresponding field in the NetLine Portal.
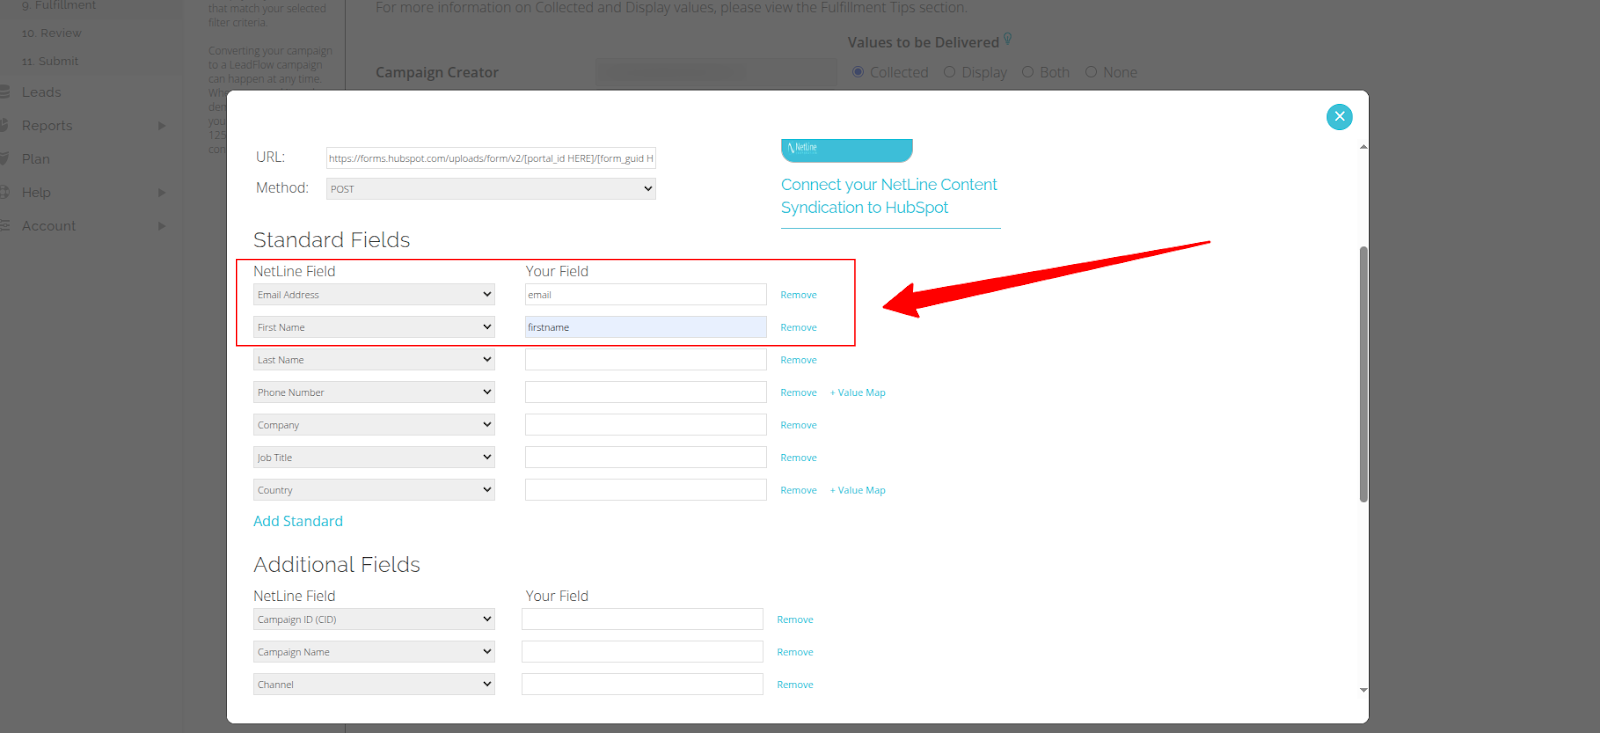
- Repeat the same process for all required fields.
- After filling in all the necessary fields, click Submit.
- Now the HubSpot connector has been successfully added.
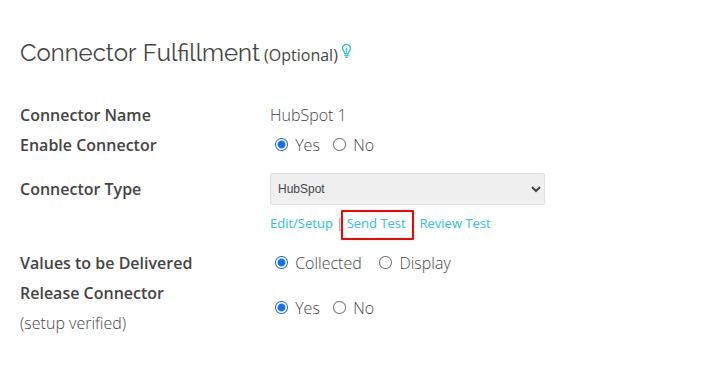
Step 4: Test The Connection
- To test the connection, click on Send Test.
- A confirmation window will appear with all the fields you have mapped. Note: The default sends 5 test leads, but you can deselect the checkboxes at the top if you want to send less.
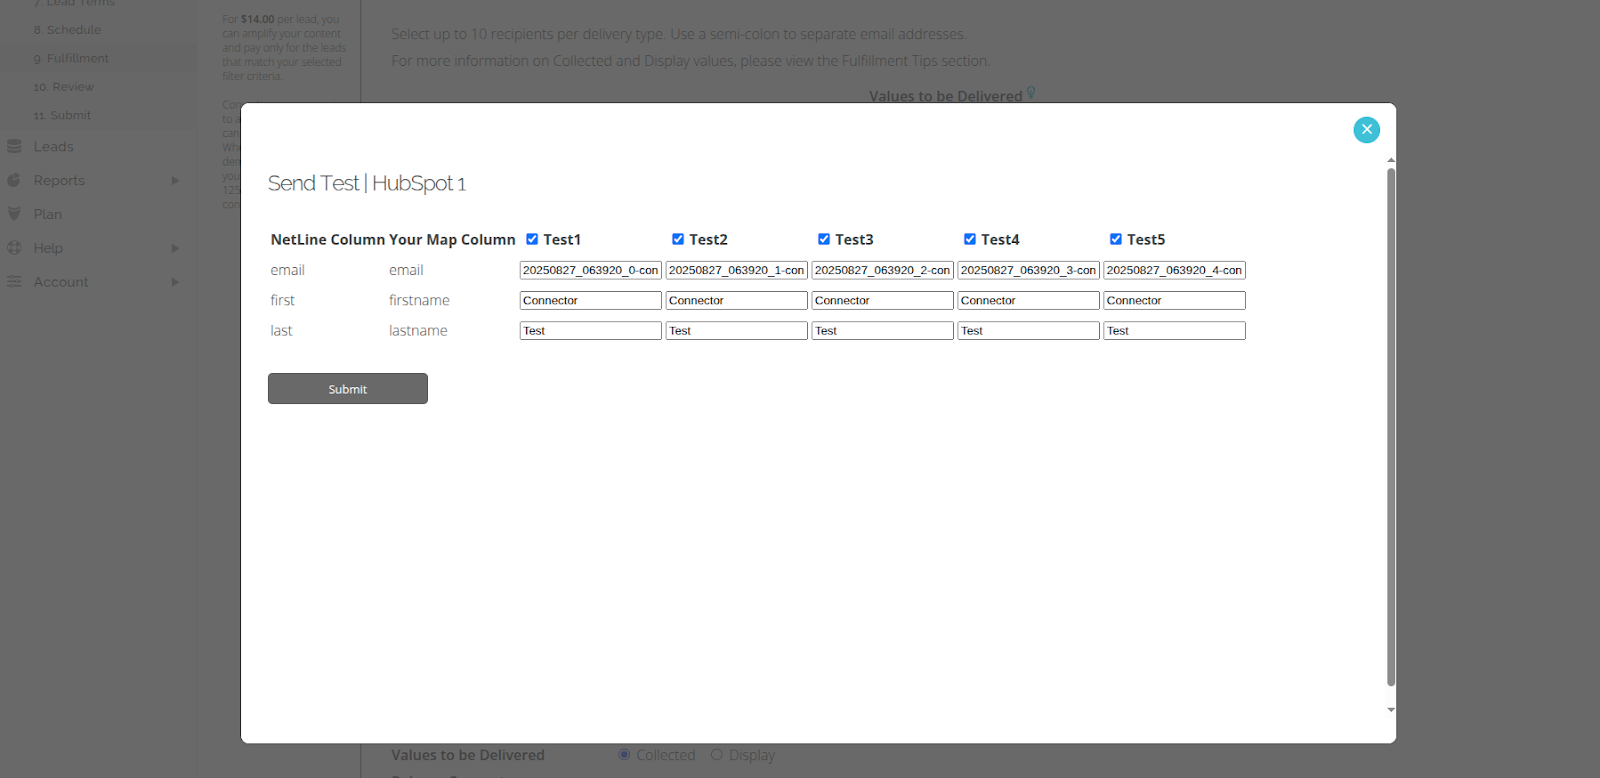
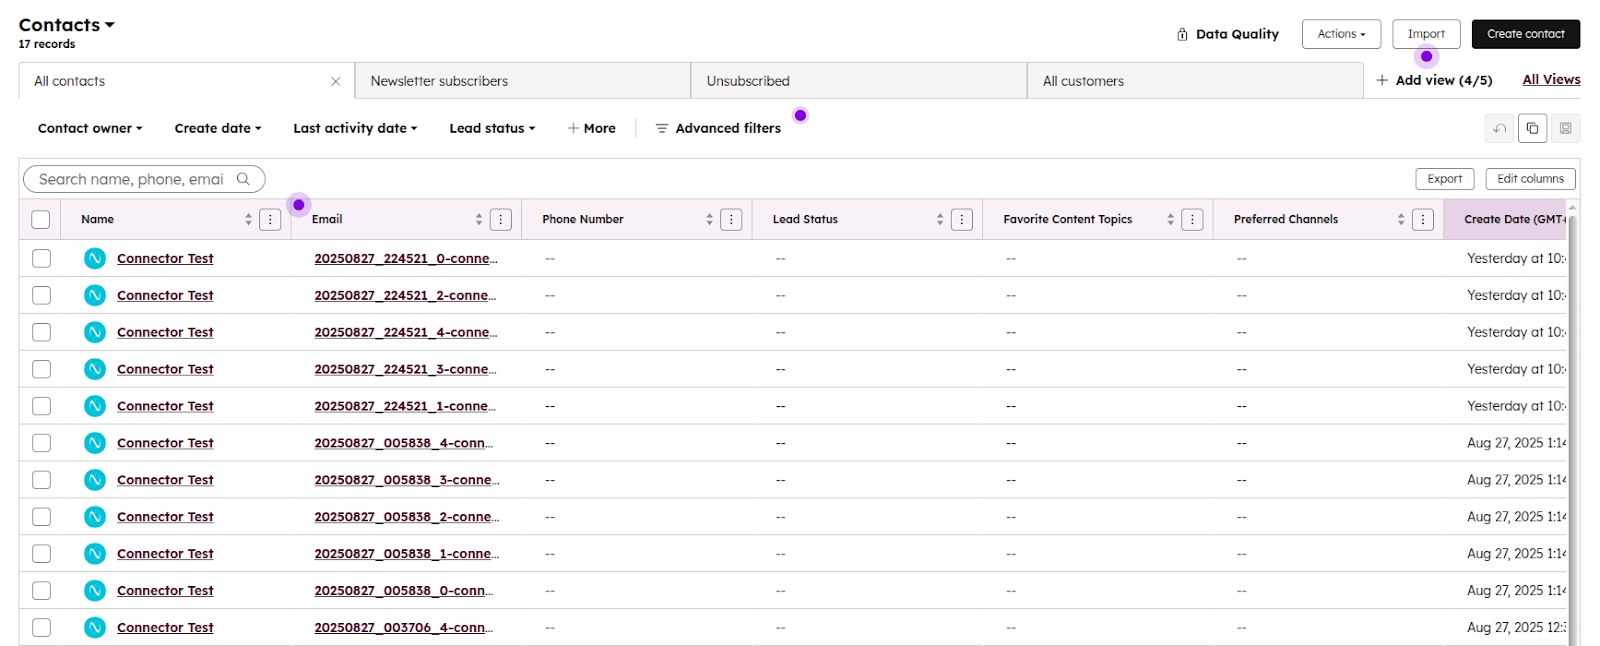
- Click on Submit.
- After submitting, you should see the test contact appear in your HubSpot Dashboard.