For Marketo-magicians leveraging the NetLine Portal for content syndication lead generation, we’ve developed new resources to help you connect your accounts and start some real-time fulfillment of your NetLine leads.
Get the full Marketo Connector Guide or keep reading…
In a few simple steps using an embed code, Marketo can quickly begin receiving your NetLine leads and pass through to sales or a lead nurture program. Just as important as capturing a lead, the nurture path is critical in developing relationships with prospects and building their perception of your brand. With Marketo, marketers can methodically transform marketing qualified leads into sales qualified leads.
Connecting Marketo to the NetLine Portal
Before we dig into the process, it’s helpful to point out that Marketo field names are most easily found within your own admin settings. Rather than spin your wheels searching online for a doc that contains all of those values, a list of what you will need is right within your own account.
1. Create a Form in Marketo
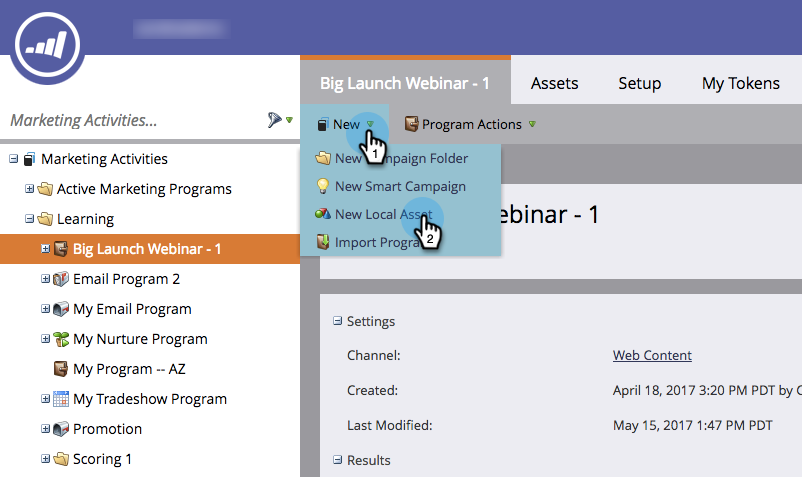
by clicking New Asset and selecting Form. Enter a form name, check the box for “Open in Editor” and click Create.
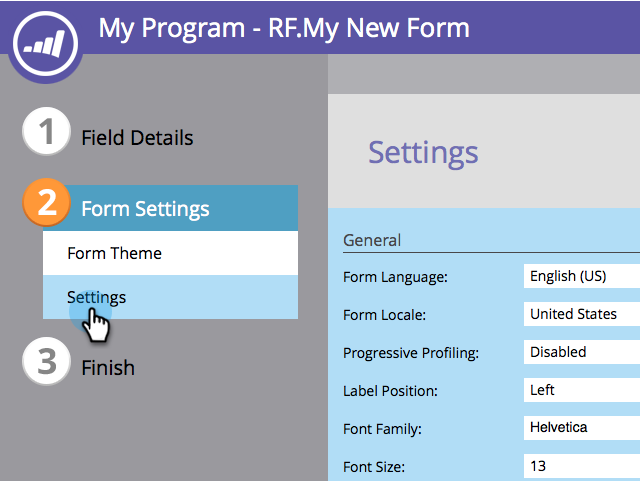
In Field Details, add fields. These will also be added to the NetLine Portal form to ensure they connect. Next, complete the form settings by selecting language, font and position. Keep in mind, this form is just to capture data, it’s not going to be visible.
2. Find Your Form Embed Code
Next, find your form embed code by clicking on Marketing Activities > Form Actions > Embed Code.
Here’s an example:
<script src=”//app-sj04.marketo.com/js/forms2/js/forms2.js”></script>
<form id=”mktoForm_1234”></form>
<script>MktoForms2.loadForm(“//app-sj04.marketo.com”, “999-XXX-999”, 1234);</script>
3. Grab Your Marketo API Form Field Names
Next, grab your Marketo API form field names.
Under Admin > Field management, click Export Field Names* and an .xls file will save (“Fields.xls). Use the SOAP API names to connect your forms.
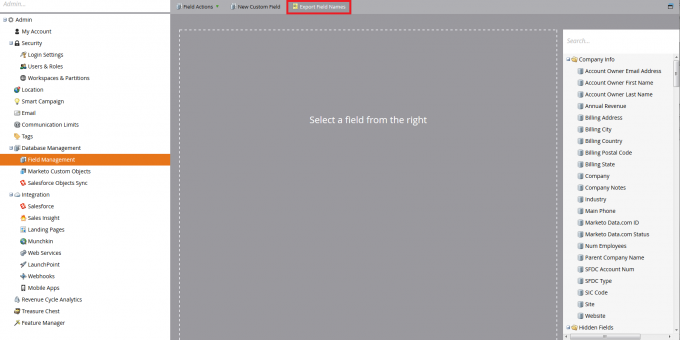
*For more information on how to find these settings in Marketo, check out their Documentation page.
4. Configure Your Settings
Using the embed code from the form (step 2) and API field names, go into the NetLine Portal connector setup module to begin entering the Marketo values. The Marketo POST URL standard format for entry in the Config Settings fields:
Paste “app-sjo4.marketo.com” from the embed code into the standard format to get the full POST URL. So, in our example the X from the above URL is replaced with sj04:

5. Establish Your Field Names
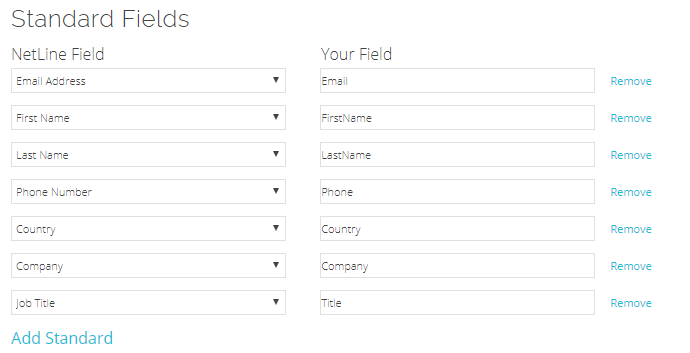
Now, we’ll start configuring the field names. Using the .xls sheet, match each Marketo value to the NetLine standard fields. Add or remove where there is or isn’t a field on either form – this is essential to making sure the connection works. If there is an extra/missing field between the two forms, they won’t connect.
You can also add custom questions, which will be sent if the questions exist on the Marketo form.

6. Finalize Your Constant and Hidden Fields
Constant fields will consist of any hidden fields on your form and Marketo required hidden fields: formid, formVid, and munchkinId.

7. Test Your Connections
Now it’s time to send some test connections! Click Submit once all of the fields are complete and click the link to Send Test. Test connections should transmit within a minute or two. Once confirmed, click Submit and move to the next step to release the connector.
Abracadabra, you’re done! With your own list of values in hand and the embed code, it’s as simple as copy/paste in a few minutes to start funneling NetLine leads into your Marketo account.
Want to get started with your own NetLine Portal account? Create a free account to see how it works and start generating leads with content.

